
D**N
Easy setup, but poor QC & issues with Auto Bed Levelling. Creality support team very helpful!
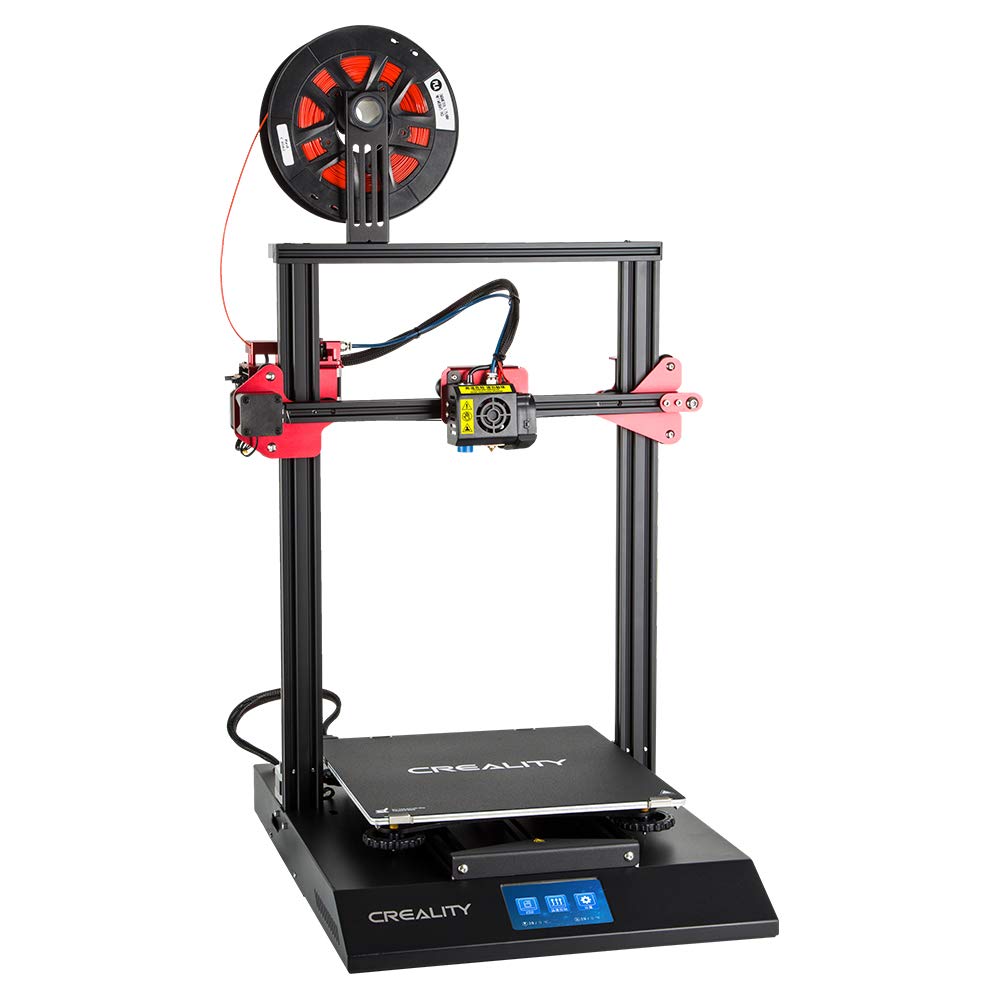
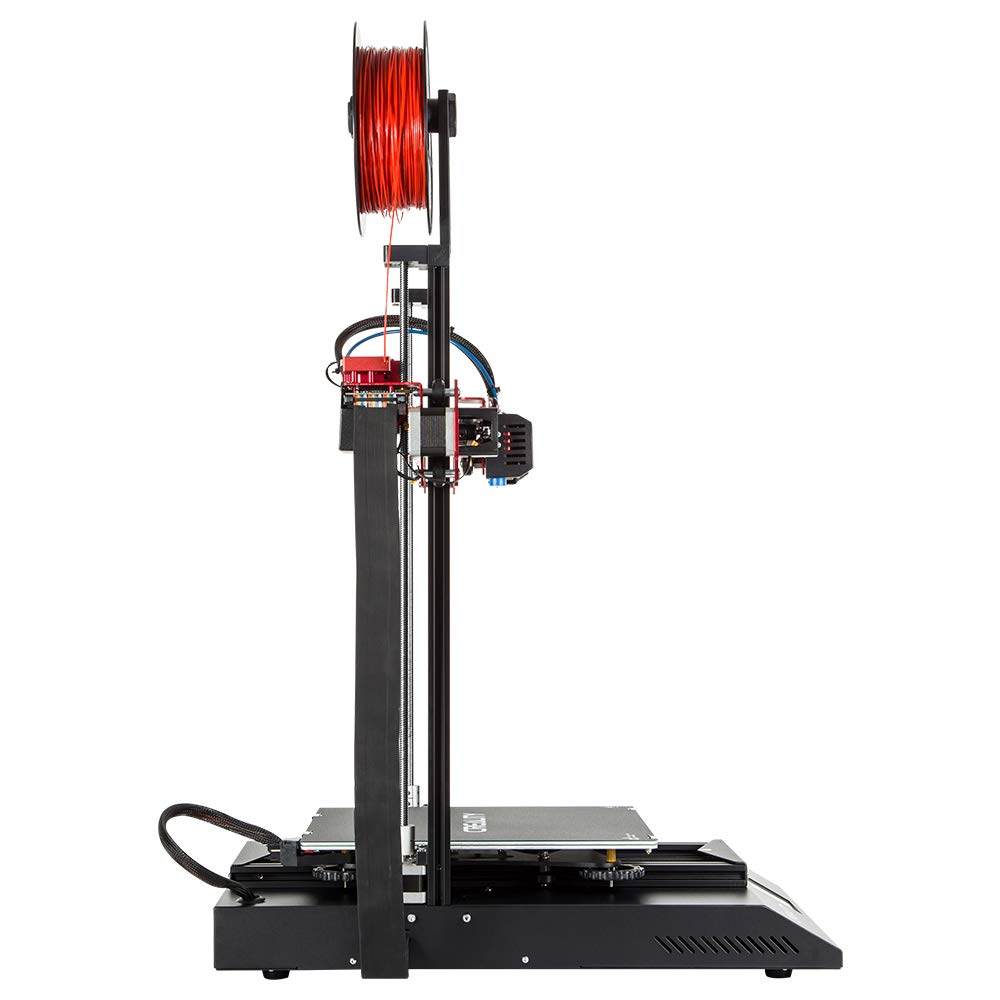
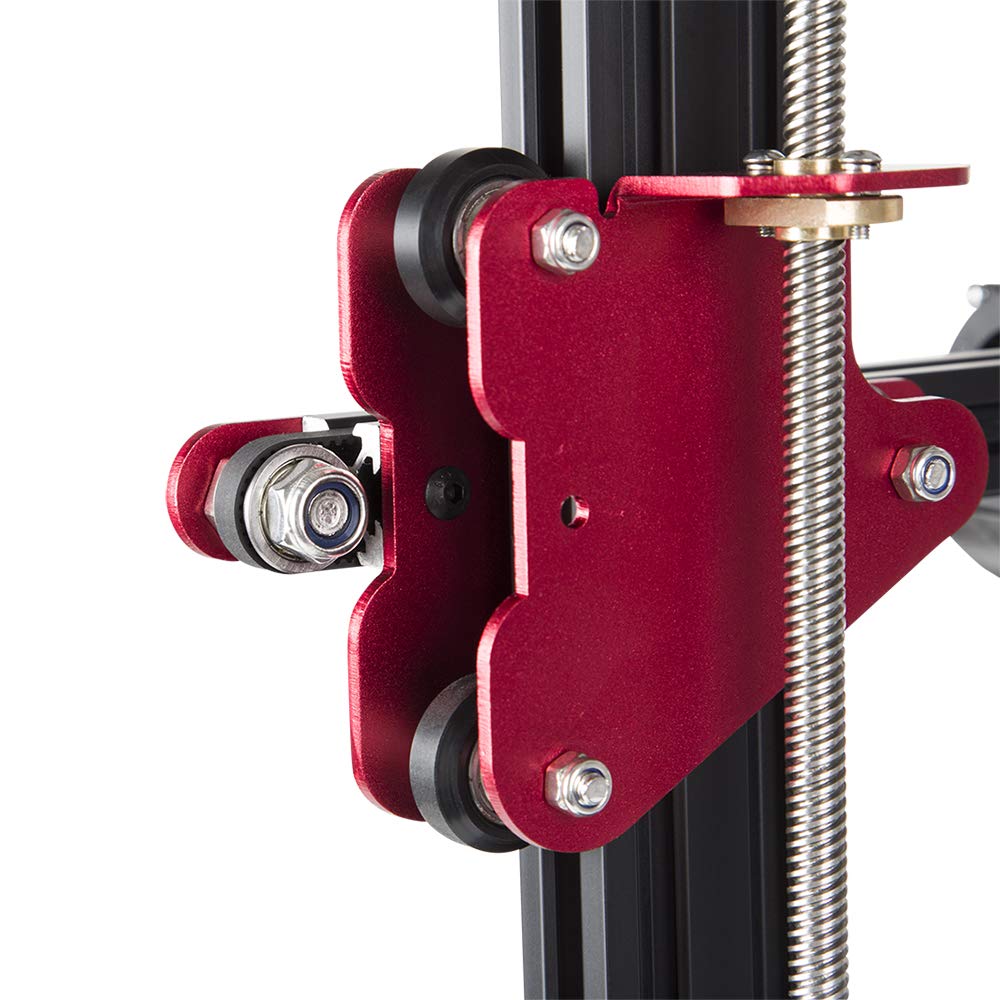
Out of the box, setup was incredibly simple, and I was able to print off the "test dog" figure once I figured out that I needed to move the STL to the root of the SD card.Don't bother installing the out of date version of Cura slicer that comes with the printer, pull down the latest version from Cura's website.QC issues - mine came with a broken ribbon cable from the base unit to the control box on the X gantry (broken strain relief on the cable so the clips would not hold it in place), but it stayed in place on it's own enough to hold and be usable. Worse though was the tension on the Y Axis belt had been set so tight in the factory it had bent the Y-Axis idler pulley screw at the front of the printer which meant that over the course of the first 3 prints I did, the idler pulley (which has sharp edges) was happily chewing it's way through the belt!Eventually the belt was so worn that i could not print at all because as soon as the printer moved in the Y Axis, the belt just jumped off the pulley!Also, the Automatic Bed Levelling on mine is not 100% repeatably accurate and often varies in it's measurements.It actually managed to accident tally damage the bed during a private t by reading the height wrongly which caused the nozzle to dig into the build surface!Fortunately though, Tina and the team at Creality support were very helpful (which is why I bought mine from the OFFICIAL creality store here on Amazon), and replacement ribbon cable, 2 replacement belts (so I'd have one spare) and replacement screws for the idler pulley were sent out quickly from their EU warehouse, and I was given a choice between a replacement "standard" bed and their new green fibreglass bed.I went for the green fibreglass one, but should have stuck with a replacement of the standard aluminium one with it's coating, as getting the levelling sensor to detect the fibreglass bed was a pain (and involved adjusting the ABL sensor sensitivity and height); and the fibreglass bed is actually too short for bed so can't be clipped in properly.When I replaced the screw for the Y-Axis idler I had to put a washer between the printer case and the idler pulley base to raise it up enough that the new belt would not be rubbing.Since then, the printer has been very reliable, although I'm only printing in PLA at the moment, but I still have to adjust and relevel the bed more often than I'd expect to get good adhesion on the first layer...I do recommend installing the Tiny Machines Marlin 1.1.9 custom firmware for the CR-10S Pro though as if you're using an Octoprint server to send prints to the printer, it lets you still access the "adjustment" menu for tweaking Z-axis height while the print is starting. NOTE - IF YOU DO INSTALL THAT FIRMWARE, YOU LOSE THE ABILITY FOR PRINTING TO RESUME IF POWER FAILS (as that is a Creality custom firmware feature). So it's up to you.If the Auto Bed Level sensor was more accurate, I'd give the printer a solid 5 stars.Other thing that is a MUST with this printer is to TURN OFF "Enable Jerk Control" in Cura when slicing models... If you leave it turned on, at some point you will get random shifting in the Y-axis during g printing, leading to failed prints. Turned it off though and all has been OK for me since.
M**E
Good print quality if you get one with a flat bed
Reviewing the cr10s pro.I am a machinist who wanted a good low-maintenance printer to create prototype parts to be machined as well as making the odd functional part.Print quality was exceptional straight out of the box.I did have to adjust the height of the sensor to prevent the nozzle from pressing on the surface when zeroing.I was lucky enough to get a unit with a flat bed so I am able to use the machine with auto bed-levelling disabled (it still uses the sensor to find the home position but does not use the 16 point grid during the print).I don't think the sensor is repeatable enough to produce a digital 'mesh' that is flatter than most beds. I will eventually upgrade to a better sensor as the current can vary the first layer by about 0.1mm - I have to adjust the Z offset during printing the first layer.I have had good success with 18+ hour prints.Run the 'test dog' print with care though- something about the end of the program made it try to go back to Z0 when the print was finished resulting in a collision and motors stalling.I haven't had any problems running my own cuts programs.the motors are silent but the fans are definitely not- it can get quite annoying if it's in the same room as the TV.I discovered that the nozzle thread is m6x0.75- different to the standard m6 of other printer nozzles.I have had the printer for a month and there is already a row of dead pixels on the screen- hopefully this doesn't continue to get worse.Overall I am happy with the machine- it may not be as good value as the basic cr10s but it requires less work to get exceptional print quality.The build quality is nice- though from reading other reviews it looks like I got lucky with certain common faults.
R**4
Pro 3D Printer for Pro makers with quality in mind
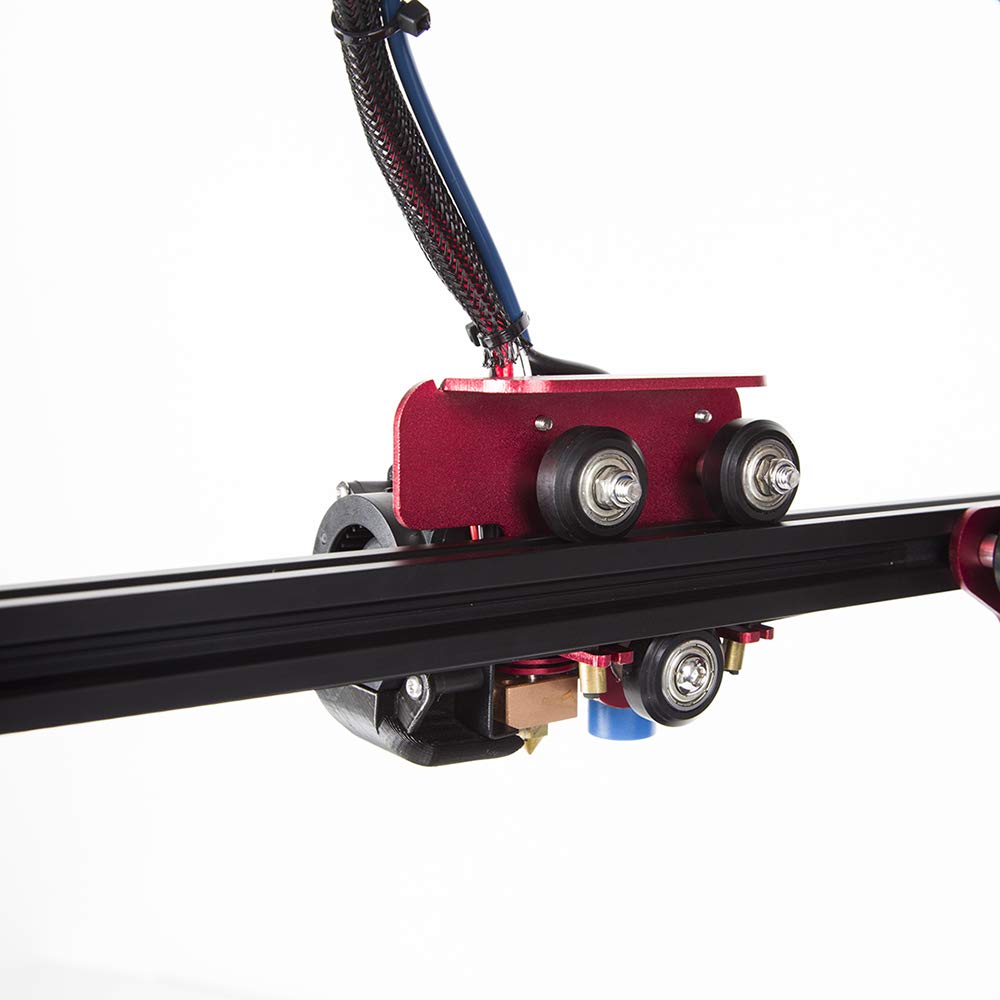
The media could not be loaded. First of all, I was a bit anxious when I saw some customer comments here and there.So when I received the printer I took time to check that everything was moving smoothly before starting the provided test gcode.It took me about 2 hours to get started, but you could start in less than 1 hour.You only have to attach the Z gantry with 4 bolts, adjust the X gantry, and level the bed.The printer is gorgeous at first look and the frame is really stiff.I stopped the first test print on purpose to go to bed by switching off power supply so it was a great opportunity to test the power loss recovery the day after, which worked great.Then I started to slice myself some benchies using my regular Cura profile and got an almost perfect print without any calibration. Finally adjusted the flow and I've been blowed up with the quality at 0.2mm layer, much better than my other printer at 0.1mm layer. Really impressed ! So I ended with a 30cm rude gnome printed in about 30 hours.The printer configuration is well balanced with great features and specifications.- The dual drive extruder gives a consistent extrusion- The Capricorn tube avoid too much friction- The MK10 hot-end provides high precision and regular flow- The Trinamic drivers moves steppers smoothly and silently- Open Source firmware allows for maximum customization- LCD touch screen makes the printer easy to use- Power failure recovery is like a second chance- Filament sensor makes you confident with your remaining materialThere are two small issues to me that aren't big deals- Stock firmware lacks of EEPROM configuration saving. Since the firmware is open source, we can easily fix it.- Stock cooling fans are really noisy compared to the steppers motors, but overall it's more silent than low cost printers.In order to improve the experience I updated the firmware to TinyMachines one and customized it a bit for my needs.I also checked inside the printer, all the wiring and electronics are high quality and give confidence for long prints.Very happy and excited with my purchase so far, I recommend it to all people that are already familiar with 3D printing as well as people who want to start with a great setup ! It seems that issues mentioned here are far behind.
Trustpilot
3 days ago
5 days ago