🚀 Elevate Your Workout Experience!
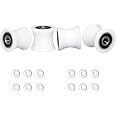
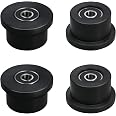
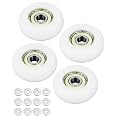
The Total Trainer Rollers/Wheels set includes four high-quality wheels designed to fit a variety of Total Trainer models. Made from durable Thermoplastic Elastomers (TPE), these wheels ensure a smoother and quieter workout experience. Each set comes with all necessary bearings and has been lab and gym tested for optimal performance.
Color | White |
Material type | Thermoplastic Elastomers (TPE) |
Number of items | 4 |
Batteries included? | No |
Brand | FRECCU |
Manufacturer | FRECCU |
Package Dimensions | 8.79 x 7.29 x 4.09 cm; 281 g |
ASIN | B09MSCLFQB |
T**Y
Great to know they still make these
I’m satisfied with the product. Fits my 2300 good, very smooth running and because I just installed these I’m hoping it will last for awhile. A bit expensive especially for Canadians but it is what I was looking for. Would buy again for sure. 👍
K**R
These Replacement Rollers Work Great, But There are Some Details You'll Want to Know Ahead of Time..
These replacement rollers worked fine on my Total Trainer 3000. I had actually replaced the originals back in 2012 and like the original rollers, the replacements eventually began to crumble. (It seems like the rollers failing has more to do with the aging of the material that they are made of, rather than the wear and tear of their usage.) This new set may eventually crumble as well, but at least it is still possible to find the replacements! Hopefully, that will remain true for the future.Essentially, all you need for tools is a 1/2" wrench or socket (or even just channel locks or pliers, etc.) and a 5mm Allen wrench (a 3/16" Allen wrench will work, though it is a little loose fitting). The axle bolts have the nylon insert style self-locking thinner "jamb" nuts but nothing is very stubborn to remove. The easiest approach is to hold the nut while you spin the Allen wrench which will freely spin the full 360 degrees on the outside of the glide board. Two or three spins and your fingers can do the last couple turns, if you like.Before you remove the rollers, you'll be able to see that there is a lot of room on either side to allow them to easily self-align as they run up and down the track. They could have made everything snugger, and it probably would have worked fine, but the freer movement likely removes some of the potential of friction. The new rollers will move and align in like-fashion.When you take the old rollers out, be careful to watch for and keep the wafer thin, wavy style lock washers that are also installed on the self-locking nut side, so that you can reuse them along with the axle bolt and nut. These new rollers come with three washers per roller, which will make you think you don't need the old washers, but I really don't think that's why they included the third washer (in spite of not offering any instructions...)If you look at the pictures I've provided, note how the outer flange of the channel is longer and drops down below the top of the track, while the inside flange is significantly shorter. Because of this configuration, there is good reason to want to keep the outer part further away from the rail to avoid possible rubbing and that's probably what the third washer is intended for. If you look closely, you will see that I put two washers on the shaft inside of the longer, outer flange and only one washer on the inside of the shorter flange. I even considered rounding up a fourth washer to put three where I put two but the two are just enough to do the trick. (Note, the washers are pressed out of sheet metal and have a more rounded edge on one side which is best to put facing the metal flanges rather than facing the rollers, to avoid possible friction.)When you put the nut back on the axle bolt, you can reuse the original wavy lock washers, though they are probably not all that essential since the nuts are self-locking. Just barely snug the nuts, by the way, as overtightening them simply bends the flanges inward causing greater potential that the longer outer flange will rub on the track and make lots of extra noise while it scrapes the paint and metal off of both surfaces. I recommend tightening until the bolt is barely too tight to turn with your bare fingers which will have the nut fully locked on and unlikely to ever work loose, yet still not putting much pressure on the flange. You could even let the shaft spin freely, but that would actually cause unnecessary wear and tear. Best to let the bearings in the rollers do all the moving as they are meant to.Oh, and on another note, don't get fooled by the bearings seeming too tight to get your axle bolts through them, if you happen to have that experience, as I did on two of them. They're the right size, but might not have been completely deburred on the outer edge. You could file them, but it's really not necessary and forcing the bolt into the bearing works just fine. They're only tight in that initial insert and will move freely after that.When it is all said and done, your board will glide like new and will undoubtedly be much quieter than it was with the crumbling rollers, though I doubt you'll find much difference from the originals when they were new. Hopefully, the "new" roller material will last as long or longer than the original, but again, it's great that the replacements are available!
R**F
Rollers arrived
This is the second set of rollers I ordered and they came with a bearing in each end, installed and they work good.
M**R
Fit and worked perfectly
Fairly easy to install. Works great! A little pricey.
J**D
Better than stock rollers
Quick and easy install. Smoother operation than than original equipment.
Trustpilot
1 week ago
1 month ago