🚗 Fix your windshield like a pro—crystal clear clarity, zero hassle!
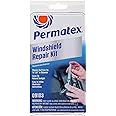
The Permatex09103 Automotive Windshield Repair Kit is a 9-piece, professional-grade system designed to permanently seal and restore bullseye and chip damage up to 1.25 inches on most laminated windshields. Featuring an advanced spring-lock syringe for precise, mess-free resin application and curing naturally in daylight, this universal-fit kit offers a quick, no-mixing repair solution with easy-to-follow instructions, empowering you to maintain your vehicle’s safety and appearance effortlessly.


| Manufacturer | Rain-X |
| Brand | Permatex |
| Model | 09103 |
| Item Weight | 0.01 ounces |
| Product Dimensions | 1.25 x 6.79 x 3.42 inches |
| Item model number | 9103 |
| Batteries | 1 Unknown batteries required. |
| Is Discontinued By Manufacturer | No |
| Exterior | Machined |
| Manufacturer Part Number | 09103 |
| OEM Part Number | 09103 |
| Position | Front |
| Special Features | Advanced spring-lock feature, natural daylight curing |
D**.
Outstanding product with great results
Easy to use with great results. Watch videos about it first, then proceed. The syringe clip seems flimsy/delicate; I practiced using it a couple of times before beginning the process. Also, as soon as I inserted the resin tube into the pedestal the resin overflowed out almost immediately. There's no way to really tell what amount is in the tube and/or going into the pedestal; it would be handy if the resin tube were clear. No matter, there was plenty left in the tube for the final step. Have several paper towel squares nearby to wipe up spills. I put a full sheet around the wiper blade just below the area I was working on. After locking the plunger in step 6, I lightly tapped around the pedestal to accommodate the release of air bubbles.Finally, my nick/chip was a small bullseye type, less than the size of a dime. This product seems perfect for that type. My windshield was originally damaged while I was traveling on the interstate, at my next fuel stop I put a piece of clear tape over the area (on the outside of the windshield). A glass repair technician suggested I do that years ago when I had another incident like this. I believe it keeps moisture out until it can be repaired.
A**Y
Great for amateurs
Very fast and easy. Instructions are clear. I had a rock chip right in front of my driver view, and this almost completely cleared it up (visually) upon filling, and the stars have not spread at all since using this. I did not want to pay a ridiculous fortune at a shop for something I could do at home, and this was perfect.
K**T
Second Time
I used this in 2022 on my windshield. Worked great could hardly see the star shaped crack when I was finished. I was really just hoping to put off a windshield replacement for a few months. Never expected I would get three years before the crack started showing back up. I am going to do it again. Expecting nothing but hoping for the same results. What I remember from the first application is to pay attention to the cut outs on the plunger and where you are supposed to push to. I, also, put a piece of cardboard on my dash, helped me see the windshield on the outside. Everything else you need is in the pack, simple process. Three years was pretty amazing, kept the crack from expanding. I truly could not see where the crack was and it was in my line of vision. Simple fix just follow the directions.
T**N
Cost-Effective DIY Solution Saves the Day
I absolutely love the idea of saving money and time by doing things myself instead of splurging at expensive stores. This solution was simply perfect for my needs, allowing me to achieve great results without breaking the bank. Highly recommend for anyone looking to be more economical without sacrificing quality.
J**S
Works with a few limitations
Product ultimately worked but when we removed the device taped to the window there was a ton of liquid product in the tube that spilled out, luckily only on the window. I watched the videos and never saw that happen but I did use most of the tube. The product did not cure completely until plastic strip was put on it and car moved into the sun. Did not changed chip appearance that much IMO but when you run you finger across it feels like glass with no chip. Took two stars due to uncured product spilling and some missing tips to removal in instructions. Tip I saw online that needed to be in the instructions was to remove excess filler from inside out leaving the filler over chip to the end then place razor perpendicular to window and scrap side to side. This prevents you digging out filler while flattening the filler over the chip. Technique worked perfectly and you will see why when you pull the plastic square off after sun exposure. Edges of filler come up a little too showing how easy it is to pull out of chip if you’re not careful.
L**A
Effective DIY Repair Kit for Windshield Chips
I recently tried the Permatex repair kit on my 17-year-old vehicle after researching online. Instead of paying $95 for a professional fix, I decided to give this DIY solution a shot. Even though my windshield chip was slightly elongated, I followed the instructions and proceeded with the repair. After exposing the resin to UV light for an hour under the sun, there were still minor imperfections. I decided to apply more resin using the leftover materials, filling in the divots perfectly. The end result was a smooth and nearly flawless repair. At only $13, this kit provided excellent value for money. The process was straightforward, especially after watching tutorial videos and carefully reading the manual. I am impressed with the outcome and hopeful that the repair will stand the test of time. Highly recommend this product for quick and cost-effective fixes!
Trustpilot
4 days ago
1 month ago
1 week ago
3 weeks ago