
DOWNLOAD THE APP


Customer Services
Copyright © 2025 Desertcart Holdings Limited
DOWNLOAD THE APP

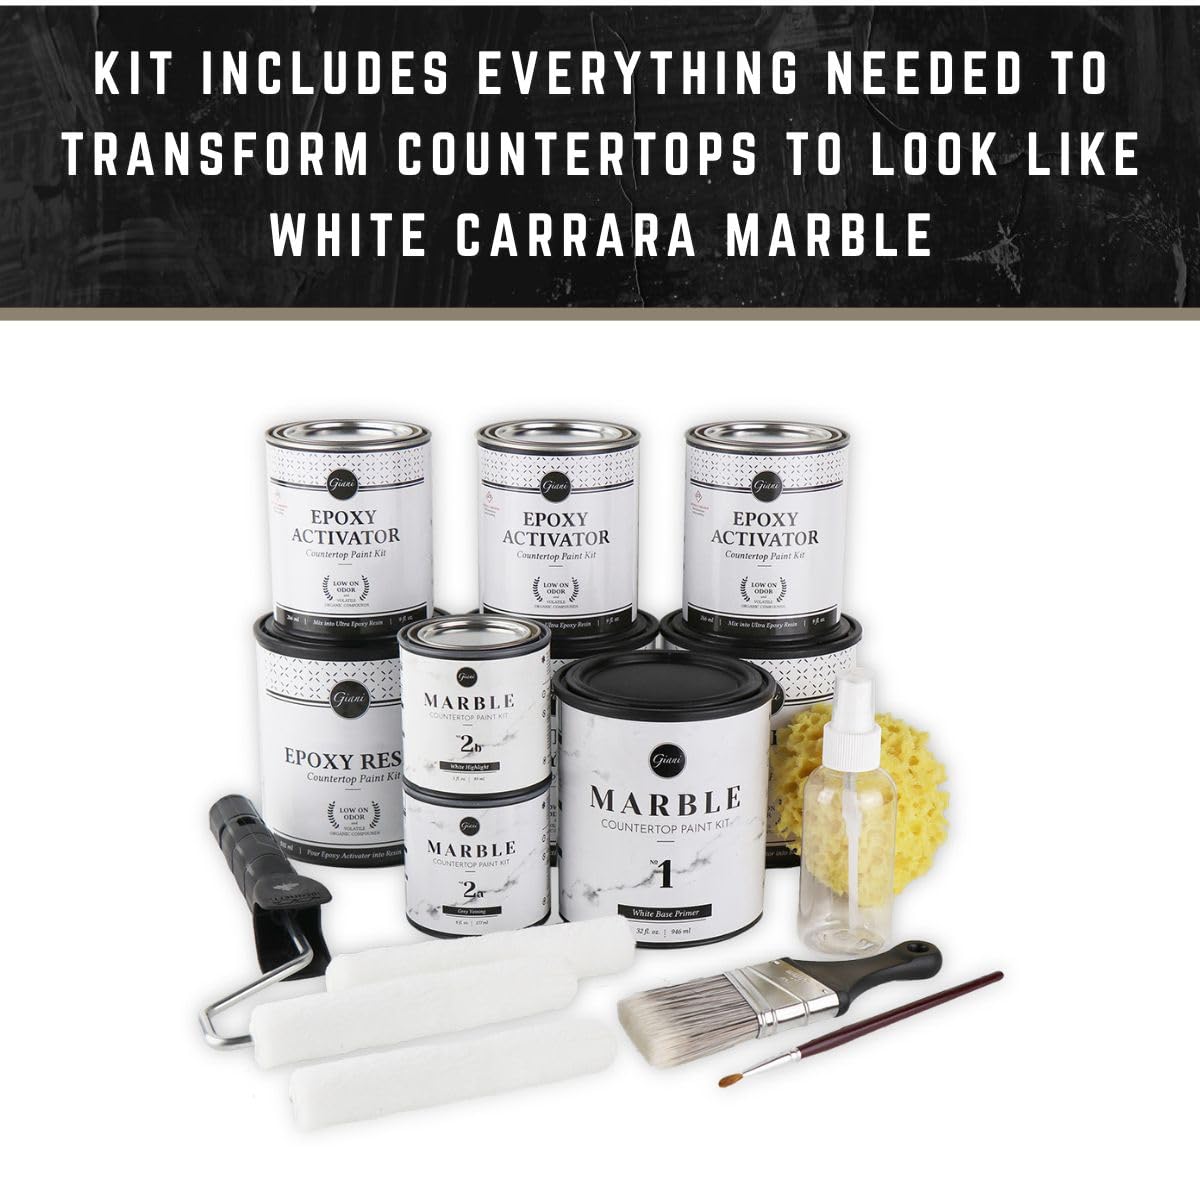


✨ DIY Luxe Marble Counters Without the Price Tag 💎
The Giani Marble Easy Epoxy Countertop Paint Kit in Carrara White offers a professional-grade, 3-step countertop makeover solution that covers 35 sq. ft. Its new high-gloss epoxy resin topcoat delivers quartz-like durability and water resistance, while the zero VOC formula ensures a low-odor, safe application. Designed to transform laminate, granite, tile, and more, this all-in-one kit includes primer, mineral colors, and tools to create stunning marble effects, making it the perfect weekend project for millennials seeking stylish, budget-friendly kitchen upgrades.


| Brand | Giani |
| Color | Carrara White |
| Finish Type | Gloss |
| Item Volume | 121 Fluid Ounces |
| Size | 1 Count (Pack of 1) |
| Special Feature | Water Resistant |
J**H
So easy and gorgeous results!
Here is my review on the Gianni, white marble kit! It came out so beautiful. I can’t believe I did it! I read reviews and watched videos for probably a month while I decided if I wanted to take the plunge! I have granite and just can’t spend the money right now to get the white marble that I really wanted! I figured what do I have to lose since I hate the counters and if I ruin them I will just have to get new ones ha ha! The kit has everything you need except the frog tape, paper plates and paper bowls, which I used for the veining process and also for the highlighting at the end which really made the whole counter pop! I did not like the tiny brush they sent so on some of the videos I watched on YouTube they used a turkey feather. I highly recommend this as the lines came out beautifully and very natural! I dabbed the feather, then dabbed on a paper plate and dragged the feather up down back-and-forth to get some really nice lines! I needed a paint tray and used foil to line it for each coat so i could throw it out easily and use the tray for the next coat. I put my roller in a baggie in the fridge so it wouldnt dry out between coats. I did buy a few extra sponge brushes which I used, but the one in the kit is far superior. Whoever thought there was actually a real quality sponge brush! I studied the veining on YouTube videos, Google, Pinterest you name it since this was the most important thing to me…the right look, shading and design. I finally found a few I really liked and took pictures and put them in my phone in an album. I decided which ones I wanted to use on each section of my counters. I practiced drawing them on paper over and over, and then when I did them on the actual counters, I kept my phone right there to use them as a guide, which really helped! The kit includes a very small practice board and I did a few veins on it and saw how easy this would be. I really can’t believe how beautiful they turned out! I did 3 main veins on either side of my sink and played around with them then added some extended and some very light veins. Less is more and be careful not to go too dark. I set up a covered table the night before with everything that I would need. The whole process took about 14 hours but I have a very small kitchen with about 18 sq. ft. of counters. I got a good nights sleep and got up about 5 o’clock in the morning and started with my taping and then my first coat of primer which took about an hour total. I made a cup of coffee and waited an hour and did a second coat and then a third after another hour. My granite is dark, so it really needed a third coat. Then I proceeded to the veining. I have to admit I was very stressed hoping I could do this and do it right. It turned out to be so much fun very easy and I just love them! I used the pics on my phone as my guide which really was helpful. Then I waited four hours before I did the epoxy. I went out and had lunch and took a drive came back and again was very stressed because this part really scared me. It turned out it was so easy although it probably is the most detailed part of the entire project. I feel like I needed to use more of the epoxy than they said, unless I just didn’t figure it right. Make sure you tape and cover everything including the floors in front of everything. I actually didn’t get anything on my appliances or floor, which I was shocked! I checked my epoxy every 5 minutes for the first 30 minutes or so and found lots of small areas I missed or little “sink” holes that would pop up. Check under the edge constantly for drips. I used a sponge brush to even them out. If they dry you will have hard drips under the edge and I’m not sure how you get that off. Definitely use frog tape. I will never use blue tape again. The frog tape is unbelievably superior! I had a little tricky area on the counter sides on either side of the stove. I decided to not use the epoxy there and just use a water soluble polyurethane. I just felt it was going to be easier without having all the dripping going down the sides in that area and then I could put my stove back while I did the epoxy in the kitchen and I had more room to move around. I think that was a good move. I left the tape on for over an hour until there were no more drips under the edge. I have no pets and I closed my AC vent so I had no specs of dust, bubbles or hairs. It’s so beautiful like a sheet of glass! Note* wear rubber gloves when handling the epoxy incuding pulling off the tape. It’s VERY sticky and hard to get off your hands! All in all, the process was super easy and fun, but I did take my time to prepare with tape and the drop cloths. I have an Undermount sink so I felt that was a little tricky to tape around it, but I took my time and everything came out beautifully. Take your time enjoy it and you will be so happy with your counters when you’re done! It’s really an easy and fun project!! I feel like I have a model home now! Absolutely love my kitchen counters, and this product!
C**.
Beautiful Results and Not Hard to Do at All!
I can’t believe how well this kit worked! I had a dark granite bathroom counter that I didn’t like. I wanted to brighten it up, but every quote I got for marble was so expensive. So I decided to try this kit. If it came out horrible, I would just replace it anyway, so what weas there to lose? Be sure to read the directions carefully, and – better yet- watch a video or two. That was so helpful. I took notes on every step and tip so I could print it out and have it with me. I looked at it often! I had never done anything even close to this and yet it turned out really well! A few tips I have that I would use next time if I did it again: * Give yourself plenty of time. I soooo just wanted to get it done after 3 coats, but I could still see some dark thru the white so I did a 4th coat and it made all the difference. * I didn’t have luck spraying the veins with water or using the brush to feather so I wiped it all off (easy enough if you do it right away) and just used the small paint brush and to me the veins look fine. * As for the bubbles you are supposed to look for once the epoxy is on, I was thinking they would be big bubbles so I didn’t really see any. Now I realize they were small… and I have a lot. It is not a big deal, being in my bathroom, but if it was a kitchen counter I might be mad. All of the reviews were right about hairs, too! I blocked the vents, kept the cat out, tied my hair back, wiped it totally clean first, turned off the air conditioning, and STILL there were hairs. I got most out with a tweezer, but ick- messy! *Everything you touch to the epoxy is sooo sticky. I mean, that seems obvious, but still I was surprised! And when you put that stuff down somewhere, THAT will become sticky. I put the foam brush and stirrer (both covered in epoxy) on a few layers of paper towel and laid that on some wood and the next day they were glued to the wood. So have something nearby you can put sticky things on and not care. *Have vinegar on hand, too! No matter how careful I was, I got it the epoxy on my fingers and flashlight you use to check for hairs and you will need the vinegar to remove it. * My biggest frustration was removing the tape. I was really careful to tape, and the walls and cabinets were fine. But around the sink I guess I let the tape touch a bit of the sink in a few places so it did not get painted and I could see brown through. (I later touched it up with the white paint which is ok, but I may use caulk later to make it look even better.) Perhaps the tape/epoxy pulled a bit of it off, not sure. It said to pull the tape off between 1 and 2 hours so I did 1.5 hours and it might have been too long. I would do 1 hour next time. AND the tape came off in so many pieces and it was so sticky with epoxy, it got all over my gloves. So then my gloves were all sticky and I couldn’t get the tape off my gloves to throw it away. Luckily I brought some of my own gloves in the room and a few times I just took them off, wadded up with tape, threw them in the trash, and put on new gloves. Next time, I would make sure the tape pieces overlapped a lot so they would come off in one continuous piece. I would also use something to roll the tape on to instead of collecting it with my gloved hands. Maybe paper towel tube or something. (Like the way you would wrap up Christmas lights). This would stop me from having to touch the tape at all. That was a mess! But really nothing else was. Overall, if you are considering replacing a counter with marble but don’t want the expense, try this first. I am literally 98% thrilled with the final results. And I think anyone who saw it would assume it is marble. It is shiny and so very pretty. I am not really a DIY’er; If I can do it, you can do it. Use theirs, or type up step by step instructions in your own words to follow- that helps you know the steps even better in my opinion. Even though I thought I had it all down, I would still look at my notes sometimes and see something I was about to forget. But the kit is great and includes nearly everything you could need. My counter is just beautiful and I am quite impressed that I could do it all by myself!
A**R
Beautiful and Worth every penny!
I am beyond thrilled with my counters. It has changed the overall look and feel of my kitchen and dining room! It was surprisingly easy to do thanks to the video, directions and quick guide. I was intimidated at first but they made it so simple! The kit is perfect! I do have some slight imperfections but they’re only noticeable to me and besides I saved thousand$ doing it myself. I’ll buy Giani products again! And will recommend for sure! Thanks, Giani 😍
L**Z
Incredibly amazing product!!! Super happy will think of new projects so I can buy it again
I am absolutely in love with this product and the results! It was very easy to work with, excellent quality, and delivered truly beautiful results. I used it on my kitchen countertops and wow, the transformation is absolutely mind-blowing. If you follow the instructions and watch the videos, this is something anyone can do. The only drawback is the wait time. To achieve the best possible results, you do need to allow a full 7 days before using your countertops again. That said, giving up a little time is completely worth it when the end result is stunning, professionally finished countertops. When it comes to epoxy, patience really does pay off. I also had a couple of questions during the process, and their customer service was phenomenal. I spoke with Jacob, and he was absolutely awesome knowledgeable, helpful, and genuinely supportive. I 100% recommend this product and their customer service. I rarely write reviews, but I had to share because I am beyond happy with my experience and results. I’ve included before-and-after photos and hope they help others who are considering this. I also chose to add white diamond dust and glitter flakes to give the counters my own personal flair, and I couldn’t be happier with how they turned out!
S**D
Take the chance
You’ll be happy with the outcome if you’re not expecting perfection. I had blue speckled laminate countertops with some minor dings in them that were installed in probably the early 90s. My plan was to remove those and have quartz or some other stone countertop installed. I love DIY and have renovated all but one room in my house to date. I figured this might be a fun challenge for myself, so I decided to take the plunge. New to me countertops for $200 didn’t seem like a big risk. Worst case scenario I would follow through with replacing them with stone if they ended up really botched. Be sure to allow yourself 2 full days for prep and painting/epoxying. I completed it over the course of a weekend like probably most people would. Be very thorough with your prep work. It will pay off big time in the long run. Epoxy is very messy to work with. Painting on the primer was the easiest part. It’s going to be streaky after your first coat. Although my countertops weren’t all that dark beforehand, I opted to do three coats of primer. For whatever reason when the laminate was installed, it wasn’t wrapped around the edges of the countertop. That was left as wood, which would get easily scratched, and need to be touched up with enamel paint every so often. The last time I touched it up I decided to do dark gray instead of white. That was one of the reasons I did that third coat of primer. I’m really looking forward to not having to continuously touchup the countertop edges anymore now that they’re epoxied. Next up was the most intimidating part to most: drawing the veining. After the first one or two it’s far less intimidating. I actually found it to be fun, and you really can’t mess it up because it’s a matter of personal preference. I didn’t want the countertops to be overly busy, but I wanted the veining that was there to be dark and more defined. I’m happy with the outcome. If you do mess up one of your veins, you can flood it with water and wipe it away to start over. You do have a limited time before it starts drying though. When that was done, I let that dry overnight, and planned to finish off with the epoxying on day two. I had this strange fear of the epoxy catching fire, as I read it can do that if you allow it to sit for too long in the container. When I was done pouring it, I made sure to take the empty canisters outside even though they barely had anything left in the bottom. Some tips I would give after completing that part would be don’t overwork the epoxy. I have some minor rippling like you to see when tossing a pebble into a pond. The company said that could be as a result of overworking the epoxy. I especially noticed that around the countertop edges, which I probably did overwork with the paintbrush making sure they were fully covered. I also noticed it more around my sink. The epoxy is self leveling, so it should do just that if left to run off the edges as designed. The only fix for that per the company would be to sand down the entire affected area until you can no longer see the ripples, and pour a second coat of epoxy. Because of the messiness and seven day cure time, I decided it didn’t bother me enough to go to that extreme, at least not at this time. I would’ve had to wait the full seven day cure time before even beginning to sand, and then have to wait for that full cure time again. I wanted to get back into using my kitchen. Probably the most frustrating part of the entire process was removing the painters tape from around my sink and the backsplash after waiting about an hour and a half after pouring the epoxy. You have to wait long enough for it to start to set, but not too long that it’s cured completely. There were a few spots, especially around the sink, where the painters tape peeled not only the epoxy, but some of the primer as well. I could see my original countertops. Thankfully, it was able to be hidden by caulking with white acrylic caulk. I included some photos of the sink peeling for reference before I caulked. If you have pets, you’re probably going to find a stray hair or two cured into your epoxy. I cleaned the entire area and surrounding rooms very thoroughly multiple times throughout the process. I kept my two dogs out of the room the entire time. I still found 2 dog hairs on the surface that must have settled during dry time. Thankfully they do provide a sanding and polishing technique you can use to remove any surface level dust particles, hairs, or scratches. You just have to wait the seven day cure time before attempting that. So far, I am very happy with the results overall. They look great, and they changed the look of the kitchen for a much more affordable price than stone. I’ve only had them for about a month, so I can’t speak to durability long-term. They do seem to scratch relatively easily, but hopefully polishing them once a month will take care of that since they’re surface level. I do notice fingerprints and smudge marks aren’t as easy to clean as the laminate was. I think that’s due to the high shine and reflectiveness. I have been using a non-toxic, mild all purpose cleaner. One negative was the cost to purchase their countertop cleaner directly from them. I think it was almost $13 per bottle, but the shipping cost was 20 something dollars. I couldn’t find it available to purchase from Amazon. I bought appliance mats off Amazon that will protect the countertops from the heat of the appliances, and also make it easy to slide them as needed without scratching the countertops. I thought it was a pretty easy project for someone with some DIY experience. I would definitely do it again without hesitation.
O**E
This is a great and inexpensive alternative to getting new countertops
This is an incredible deal for less than $200 for my kitchen (basic countertop kit only). You get about a quart of primer and two small cans of color pigment for the marble look. You also get a ton of resin/epoxy, plus brushes and enough accessories to do the job; no multiple trips to the store are needed. As long as you are patient and careful, your results should come out really good. It will look even better if you have a bit of artistic talent. Regardless of this kit, you really do need to make sure all deep scratches and divots are sanded down and filled (wood putty is the best choice). My counter is old and had already been painted over once with Rustoleums counter paint. That stuff was ok for a while but not good at all for a long term solution; it scratched and chipped easily. Just stick with this product. I did a quick sanding on the old counter and that was more than enough to scuff the surface for the primer to stick to. I was very thorough on the sanding and filling, but once you prime over, any parts you missed will become very obvious. The epoxy coat will do a good job with gap filling so the top is smooth, but those scratches and imperfections underneath may still be noticeable. You may want to do a 2nd round of puttying after the 1st coat of primer if you see lots of bad spots. Then do the next primer coat to top it off. You have to do 2 full coats of primer; the counter needs to look as white as possible so you see none of the previous countertop color underneath. You get 2 colors for the marble look, white and a dark grey. I ended up mixing some of the grey and white to get a lighter grey color, which helped blend and smooth things out. The grey is pretty dark so a little goes a long way. I like a more subtle marble style so I needed very little grey. I ended up using almost all the white for blending and covering spots with too much grey . I found that this kit included far more epoxy than needed. 1 can of the resin & activator took care of over 20 square feet. While the process takes time and is a bit tedious, the results do look great. ----------------------------------- Things to take into consideration: Hair & dust! If you can, try to tarp off the kitchen to minimize any of those particles, especially if you have pets. I had the kitchen fully closed off and still found so many hairs getting in the epoxy, so I bet everyone will have at least a few to deal with. Tweezers will likely be needed to get those hairs out. Air bubbles. Unless you are a pro with liquid resin like this, you will likely get some small air bubbles. Instead of trying to poke them out, it is easier to use a needle or safety pin tip and do a light swirl to get the bubble to the surface. Unless you live in a sterile vacuum, expect at least a few air bubbles or hairs to get stuck in the epoxy. They probably won't show much, but still good to set your expectations properly. If you want an ultra smooth finish with no imperfections you may want to do an extra step not in the instructions. I would wet sand with ultra ultra fine grit sandpaper (1000+ grit) Wet sanding is great to prevent excess dust. You may be able to use an orbital buffer to restore the shine after sanding, but a 2nd epoxy coat may be needed after. Either way, these steps are not necessary unless you are a bit 'particular' about perfection. ----------------------------------- Overall this kit does what it says and does a very good job at it. That being said, you will likely spend half the money or less if you buy the components separately. The pigment colors are about the size of those 'sample' cans of paint you can get at the hardware store; about a pint or so in size. If you wanted to experiments with a pearl like tone or replace the grey with a color, then any water based indoor paint will work. This kit takes about a week to fully cure so don't put anything heavy on it until then. Even after a few days when the epoxy is partially cure, you should still be careful. This product is really good and highly recommend it.
W**N
Absolute TRASH product and worse customer service
As they say if I could give -5 stars I would. I bought this product and applied it with a general contract paint professional. He had experience with many different kinds of paint/epoxy refinishing kits, but not this exact brand. The base layer paint went on well and then we painted an amazing vein pattern. But when it came time to apply epoxy and the application method stated with the product, it was absolute mayhem. The epoxy is extremely thick. They suggest rolling it with a roller brush, which leaves 1 million air bubbles in the epoxy. Some of the epoxy cured, but a lot of the epoxy did not cure. This is a very simple mixing process so it was not faulty mixing it’s just faulty product. It has been two weeks and the epoxy is still incredibly gooey. It is gooey where you cannot touch the countertop or lay anything on it. It has wreaked absolute havoc in our world. We cannot utilize the kitchen whatsoever and now are faced with the choice of stripping the entire countertop with noxious chemicals or replacing them with an actual new stone product to the tune of $10,000. The granite company who came into “us told us there would be an up charge for removing these countertops since they are so incredibly tacky with epoxy and it will be a removal nightmare. We also had to cancel Christmas in our home because there was no way to utilize our kitchen. There’s no solution in between. My general contractor called the customer service line to which we are met with a very condescending and rude woman who told us to use acetone to remove the gooey parts. However, the fault in that is there anything that acetone touches even if it is a part that is cured now turns to goo. So you just have gooey disgusting tacky epoxy that is getting everywhere in your kitchen, Your cooktop, your floors, your hands, your sink. When I tell you, this is a living nightmare of a product. I hope you will believe me. A $200 kit has turned into a $10,000 disaster in our kitchen. And when they tell you, there is a guarantee, they will find a loophole every time in which they will not pay that out. They will tell you that everything has been your fault. I am a chemist, and I hired a general contractor so there is absolutely no way we botched the mixing of the epoxy. Also, anything that is laid on the countertop, even in the areas where the epoxy has cured, all items will still stick in adhere to the counter, it allows anything to bleed into the epoxy. This product should be taken off of Amazon entirely. They do not back the product and there is no way they could even make this any better. And I could go on and on. The epoxy will leave drip marks all over the side of your counters. Please just stay away from this product and do not believe in their customer service department as all they care about is selling a product and blaming you for why their garbage product doesn’t work.
J**N
Expect happy accidents and imperfections
LONGGGGG review, so if you’re curious what a crafty DIYer did, keep reading. Okay, so my husband and I bought our home just over a week ago. Before moving in, we renovated majority of our house. We painted every single wall in our living room, dining room, hallway and kitchen save where the backsplash I will install after the counters are 3/4 of the way cured (hence that hideous muddy pink color under the cabinets I haven’t painted over that was wreaking havoc EVERYWHERE). I still shudder at the previous owners design choices… I even sanded our cabinets and repainted them this gorgeous blue color. In love. Anyway, we want to eventually replace the counters with butcher block, but it is not a pressing matter at the moment. We much rather spend the money on other renovations. Okay, so that’s the backstory. I was a nervous wreck when I finally got around to redoing our counters five days later than I originally planned. No fault in Amazon’s delivery. Everything was packaged perfectly. I’m a new mom: my baby is adjusting to temporarily living with my in-laws and my husband and I have been out of the in-laws house renovating our new house. I read nearly every single review before deciding on going with this kit. I wanted a completely white kitchen. That was not happening. I have two dogs, a cat, a 3 month old child and a husband who makes a mess when it’s his turn to cook. White was NOT going to happen, but damn it, I was going to have SOMETHING white in my kitchen even if it was only my backsplash and counter tops. Go on, keep reading. Here’s a few things I did a little differently when painting the veins: I used a ton of water to get a very muted vein pattern. I wasn’t really happy with my millionth attempt and just could not figure out what I was doing wrong until in my frustration, I accidentally dipping my softening brush in my wash cup and painted over a vein with watered down white base primer. It was PERFECTION. I promptly painted over all of my top dark softened veins with watered down white paint and the veins turned out exactly how I imagined them. I let them dry overnight. When I painted the base primer, I left it overnight. I didn’t want to take any chances on the paint not being dry for the epoxy. I suggest the same if you have the time. While pouring the epoxy, yes there will be bubbles that eventually harden and you can do nothing about unless you feel like sanding it down and starting over. Not an overwhelming amount and not enough to be a problem, but there will be bubbles and you just have to be okay with that. I used a cheap rubber spatula to get allllllll of the activator out of the can and asked Siri to start a 3 minute and 3 second timer to mix. Don’t stir HARD because you’re just going to create more bubbles, just a little aggressively. Like you’re-mixing-brownies-and-your-partner-asks-for-the-millionth-time-what-color-is-this-wall-going-to-be-despite-the-wall-being-swatched-in-the-exact-color-it’s-going-to-be-painted-but-you-can’t-be-upset-because-they-are-the-love-of-your-life-and-you’re-just-a-little-annoyed kind of aggressively. I had NO animals in the house and somehow, someway, there is ONE SINGLE CAT HAIR that I did not notice until the next day when I couldn’t do anything about it. Whatever, it adds character. Really listen to the instructions when they say remove the painters tape after an hour or two. I was in the middle of painting my doors black when it occurred to me I completely forgot to remove the painters tape and tarp around my kitchen sink. There was slight dimpling around the counter where it meets the sink. I’m planning to just cover that up with some caulk. No one will ever know except me. Perfectionist me. I will always know it’s there and it will forever bother me. But honestly, I’m okay with that. Also, DON’T USE A TORCH TO TRY TO GET BUBBLES OUT. I had to scrape a bit of the burned resin off the counter and re-pour that area my husband thought he was helping me and nearly set the damn house on fire. Unless you know what you’re doing (MY HUSBAND DID NOT), DO. NOT. USE. A. BLOW TORCH. If you have a corner like we do, do the farthest distance first. I had epoxy all over my shirt that I had to promptly sacrifice to the rag bin because there was no saving it once the epoxy hardened. When you tarp, double tarp if not triple tarp. Somehow epoxy ate through a few spots and I had a whole two piles of resin on my floor. Once it hardened, I just used a razor scraper and most of it came up. The bits that didn’t are just going to be covered with chef mats. The floor will be replaced eventually. Every time you pour and you get drips, wipe the drips with your gloved finger to prevent the drips from hardening. I have one single drip that I didn’t spot, but it’s not a huge deal. I was about to cut it off with a razor blade. The counters are SO SHINY. I hope they stay that way. So far, they look fabulous. I can see some texture on the backsplash but of the counters, but again, not a huge deal. It’s not like I’m going to be touching it often and it’s mostly out of reach. TLDR: 1. Double, triple tarp. Epoxy ate through my tarp. 2. Don’t use a blowtorch unless you want your counters to catch fire. 3. There will be bubbles. It happens. 4. If you have pets, even if they are not present, you will get a hair. 5. SO SHINY. Overall, I’m happy with it. It’s a great temporary cure for something that will be replaced in a few years. Epoxy will yellow over time, so if you’re doing white like I did, expect it to happen eventually. I will update once I wait the full seven day curing period to let you know if there are any spots that showed up or if any divots occur with the coffee machine and baby bottle sanitizer doohickey and bottle warmer.
Trustpilot
1 month ago
2 months ago