Desert Online General Trading LLC
Dubai, United Arab Emirates
Desert Online General Trading LLC
Dubai, United Arab Emirates


🔍 Power Up Your Monitoring Game!
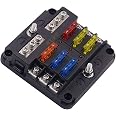
The DROK Digital Multimeter is a versatile battery monitor designed for a wide voltage range of 8-100V and current range of 0.05-100A. It features a large 2.4-inch LCD display for easy reading, smart backlight alarms for low capacity, and is suitable for various applications including RVs and solar panels. With a one-year warranty, it ensures reliability and peace of mind.
W**4
Works Great
In simple terms, this works by adding up current going both directions. The meter itself uses almost no power and will not affect how long your system runs on battery.The instructions can be somewhat confusing if you don't have a good grasp of how circuits work. The wiring diagram - how you physically connect it - is very clear though.Here's an example of a basic config:I have 2x 12v AGM batteries, each 150 Ah, connected in series for 24v. My inverter cuts out at 10.6v.BAT = 150 - this is the battery raw capacity in Amp-hours.BPC = 40 - I chose 40% since discharging much below that shortens battery life. For Lithium you could set much higher like 80 - 95%.STI = 0.3 - if current is less than 0.3 amps either in or out, the display shuts off to save a bit of power.LVP = 23.5 - this tells the unit that the batteries are essentially 'dead' at this voltage. I chose 23.5v because that's about 40% capacity when under moderate load (C/10).LBR = On. - This causes the display to 'flash' (actually it's more like pulsing) if capacity is lower than 20%, OR voltage is lower than LVP, OR your batteries are charging.PAI = 0.06 - This setting is key to making sure the system does not drift. I found 0.06 amps works for me. Basically this means that any tiny errors in current measurement get reset to zero.All the other settings are not as critical and can be left as-is for most uses.I found that voltage measurements are accurate, and current measurement with the included shut is also accurate. I've used this in several actual power outages, and it works flawlessly.It comes with 2 connector cords, one short and one long, to fit your installation. The clear cover is nice too, keeps the dust out.
B**.
Read this, many don't understand what this does
Being an engineer I see a lot of miss-information about these units, not just this one. Yes the so called "manual" is a sheet of paper written for someone who understands electricity, voltage and amperage. It's sparse and poorly written and it's hard to understand, especially if you aren't an engineer.That being said, it is a good unit, and it does what it says it will do. And no, it's not a power hog, the person complaining about that most likely didn't know there is a feature to "zero" the meter when no current is being drawn from the battery. Even with the manual it can be a little hard to setup, but once you do, it is pretty much smooth sailing from there. And these devices are a MUST if you really want to know what the state of charge is on your LifePo4 batteries. Lead acid batteries don't need this but can benifit from it's use.WHAT THIS UNIT DOES is measure CURRENT or AMPS being Put Into or Drawn Out of the Batterie/s. And this is important for Lithium type batteries. Think of this as a water glass monitor, when you use the batteries, your pouring water out of the glass, and when you're charging the batteries, your putting water back in, all the way to the top of the glass which is 100 percent charge. Current out is water poured out, and when it reaches zero, well the batteries are exhausted.BASIC SETUP: Press and HOLD the OK button until the setup menu pops up. Use the up and down arrow keys to switch between settings. Now move to the BAT setting and press OK, this enters the setup for the battery capacity in AH or amp hours. Use the down arrow to move to different number positions and use the UP arrow to advance / make changes to the number. Once your happy with your selection, press OK to exit that screen so you can use the up and down arrows to move to another screen. Example: if you have a 200 ah battery, enter "200" on the BAT screen and save.Next, move to the BPC screen, press OK to enter it and change the numbers to the state of charge of your battery, (if you know it). If you don't know it make a guess but it's easier if you fully charge the batteries before making this setting because that way you can set BPC to 100% which is fully charged. Press OK to exit that setting and Press and Hold the OK button for 5 seconds to save and exit the settings screen.Those are the main basic settings you must set in order to get accurate measurements from the meter.NOTE: You should also setup the LVP which is low voltage alarm setting, on a LifePo4 battery I recomment setting this to "11.2" which is just above total zero battery charge. If the voltage reaches this level, it will automatically zero the state of charge indicator.Set the CLR setting if the current reading is showing a current reading when there is no load connected. That is what this setting is for, to zero the no load current value.Set the OVP value to "14.5" or "14.4" as this is where LifePo4 Batteries are fully charged and the internal bms inside the battery should stop charging, thus a 100% full charge. If the voltage reaches this value it will automatically re-adjust the BPC setting to 100%.The PIA setting is related to the CLR setting and usually doesn't require adjustment.STE setting is in seconds before the screen blanks automaticlly. This is used with the STI setting.STI setting is the shutoff point for the display when the current falls below this value. Example: set to 1 amp when the value falls below 1 amp going into or out of the battery, the screen will blank in how ever many seconds you setup in the STE settings.I hope this brief explanation will help those struggling with these units.I will update if there is a problem in the future.
D**Y
nice meter and Shunt.
this look much more robust than the unit that came with my chins battery. nice quality and I like the way the cable attaches. the display is small but has lots of functions that i havnt even explored yet.
B**H
No Instructions! But works great.
I got this shunt/coulometer to help monitor my new 250 Ah LiFePo4 battery for my small off-grid cabin. It seems to work okay, but there were no instructions in the box. I used the Amazon product listing, and YouTube videos to help set it up. It seems to be working fine. I figured out how to set the battery capacity, by trial and error.I think this is what I know...• The big green circle with the percentage inside: The life/charge left in the battery.• The tilted hourglass symbol: No idea!• The floppy disk icon with a number: No idea!• The large blue number followed by AH: the amp-hours of life remaining in the battery.• The 6-digit, time-stamp looking number: No Idea! (maybe hours, minutes, seconds left in battery at current load?)• Bottom Row:• First number: load/charge in amps. Negative means charging, positive means load going out.• Second number: Voltage of the battery.• Third number: Watts being used from the battery.I mainly got this to protect the battery and let me know how much charge is left. The color display is nice and looks more professional than the basic battery monitor displays. I also figured out how to lower the brightness of the screen, but would like to be able to turn it off when not in use, so it doesn't waste any battery power, but I think it is very minimal anyway. The solar panels can maintain this with ease.I also have no idea what the UIPC image is on the left.So, while writing this I tried one more internet search and found a manual. It is not a very good manual, but I think this is the right one.https://m.media-amazon.com/images/I/91iEI2GqGHL.pdfHope this helps. It is a good shunt and monitor. Both seem well built. Solid brass shunt with heavy duty bolts and connectors. I would have given it 5 starts if it came with a really good manual. I would get it again, now that I have a manual.
R**.
Works great!
Works great!
D**
good meter
perfect for my needss
Trustpilot
3 days ago
2 weeks ago