🔧 Elevate your HVAC game with pro-grade precision and power!
The BACOENG 3.6CFM 1/4HP AC Vacuum Pump and Manifold Gauge Set is a robust, all-in-one HVAC toolkit designed for professionals and serious DIYers. Featuring a high-efficiency rotary vane pump, precision dual-scale gauges compatible with R134a, R22, and R410a refrigerants, and heavy-duty 5ft pressure hoses rated for 800 PSI working pressure, this kit ensures fast, accurate, and reliable air conditioning and refrigeration servicing. Packaged with essential adapters, can taps, and a durable carry bag, it’s engineered for durability, portability, and peak performance.

| Brand | BACOENG |
| Material | Alloy Aluminum |
| Item dimensions L x W x H | 16.3 x 7.6 x 12.9 inches |
| Item Weight | 18.21 Pounds |
| Screen Size | 3 Inches |
| UPC | 602914379809 |
| Manufacturer | BACO ENGINEERING |
| Item Weight | 18.21 pounds |
| Product Dimensions | 16.3 x 7.6 x 12.9 inches |
| Is Discontinued By Manufacturer | No |
| Manufacturer Part Number | P0216FUSA |
| Voltage | 120 Volts |
S**.
Great kit - can tap won't work.
First let me start by saying for the price I am very pleased.Now, the can tap that comes with it won't work on the new type refrigerant canisters. It is for the old type that was designed to be peirced.Went to the auto parts store and the one they had worked but was acme threads. Fortunately an adapter came with this kit that worked.Aside from that I'm very pleased overall with the kit. Manifold is far superior to the 3 line setup.For those that are a novice like me when it comes to A/C systems follow these instructions and you should be good. (Took me a bit of trial and error)1. Have a shop evacuate your system to reclaim old refrigerant if it's still under pressure. If like in my case you had a leak, there is nothing left to evaporate.2.With all the knobs on the manifold in the closed position, Hook blue side to Low service port and red side to high service port. You can't mix these up. They are different sizes and will only fit on the correct port.3. Connect vaccum pump (make sure you put the supplied oil in it. Don't use pliers on any of these fittings, they are designed to seal hand right.4. Turn on the pump. And open the black, blue and red knobs on manifold. Make sure the service port quick connects are in the open position as well (note* these go clockwise to open unlike the manifold knobs.)Let it run until it draws down to 30 on the blue guage. Close the black knob (vaccum) and shut off the pump. At this point let it set for at least an hour and make sure it maintains 30 and the needle doesn't move. If it does you have a leak somewhere and charging won't do any good.5. If vaccum held. Turn the pump back on, open the black knob back up and run for another 30 minutes to make sure all moisture is drawn out of the system.NOW PAY ATTENTION HERE TO THE ORDER OF THINGS.6.Close the black knob. Shut off vaccum pump and close the red knob (high side) on manifold. You are ready to begin with charging.7. On your vehicle there should be a sticker that states how much and what type of refrigerant to use mine happen d to be 1lb 14 oz. Keep in mind that all the cans you find will be 12 oz. Doing the math in my case makes for 2 & 1/2 of a can of refrigerant. A small scale can help you to determine the fraction of a can (if needed).8. Screw in the refrigerant can on the yellow line, screw can tap down all the way and then back a couple turns. Now you need to purge the yellow line of air. This is done my removing the small brass cap and depressing the Schrader valve (like a tire stem). Doesn't need much. Just a quick burst.9. Start your car. Turn the AC and fan on. Once again make sure the red knob is closed on the manifold. Now slowly open the yellow knob on the manifold. This will allow refrigerant to start flowing into the system. The compressor will start kicking on and off and will gradually drain the can. Look through the window in the manifold and you will see the liquified refrigerant going through. Helps to see when a can is empty as well.10. Now that you have emptied a can MAKE SURE YOU CLOSE THE YELLOW KNOB. With the yellow knob closed you can remove the empty canister. Make sure to wear gloves as if it's not fully empty you could get frost bite from liquid refrigerant when you unscrew.11. Attach next canister, purge like before, then open the yellow knob back up.12. Repeat process until you have the specified amount of refrigerant charged.Hope this helps as I had a hard time finding clear and concise instructions on line.Once again, unless you have old stock R134 cannisters (puncture type) the can tap provided won't work. It's only $7 for a new one. Aside from that I am very pleased with the quality of this set.
T**R
Read Sam A.'s review if you're confused
This is a quality kit, with a couple of exceptions.Firstly, the instructions aren't super clear. You can remedy this by finding Sam A.'s review on this product page - he's done an excellent job clarifying the necessary steps. It's not rocket science, and it will all make intuitive sense in the end, but until you've actually done it, you'll probably be a bit in the dark about what all of the different gauges and hoses do. Also watch the video "How to Properly Recharge Your AC System" by ChrisFix on YouTube for a general overview of how this all works. Note that he's using a different manifold which works a bit differently - mainly that the yellow line is used for both drawing a vacuum and adding coolant. In this product, you also have a black line that's dedicated to connecting to the vacuum pump (using an included adapter - the end fitting won't connect directly).Secondly, as Sam A. mentioned, the included can tap is basically worthless. You'll need to buy one for "self-sealing" R134a refrigerant cans that are now ubiquitous, at least in modern vehicles. You can get that at Harbor Freight, any automotive parts store, or here on Amazon. Just search for something like "self-sealing R134a can tap." That will probably have a different thread fitting, but this kit also includes an adapter that connects the tap to the yellow line. It basically comes with everything you need except for refrigerant cans and the correct can tap.That said, the build quality of the pump is decent, the manifold is excellent, and the lines are all sturdy and seem built-to-last. Mine gave me no problems at all as I fumbled through the full repair process over a few weekends.While your A/C system is open/depressurized, it's probably a good idea to replace the Schrader valves on your high- and low-side service ports, at least if your vehicles is older than maybe 5-ish years. These are common leak sources. Also make sure they're still capped. Mine weren't, probably thanks to a scatterbrained mechanic somewhere along the way. You can also find replacement cap kits (often also with common Schrader valves) here on Amazon.Servicing your own A/C is not a particularly simple task to learn by yourself, but once you've done it, it should be pretty simple going forward. It took me a lot of YouTube videos, instructions, trips to the auto parts store, etc. until I had all the right tools and materials to get it done. But now that I've done it and see what's involved, I could probably do it in the future in at most an hour of hands-on time.
L**S
Works great!
Worked exactly as expected! There were no leaks (contrary to what some reviews posted.. they might've had that problem, but I didn't). The noise level was not as loud as I thought it would be once I opened the valves.The quart of oil that came with it was the perfect amount to put it at just above the middle line.
S**C
Adapters do not work
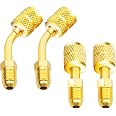
Great set up and operation.The only reason for 4 stars is because with the automotive the included valve only works on non- self sealing cans of 134a. They should also include a valve for self sealing cans as well!Same with my mini split. The included adapters did not work. I had to use the one I had when I installed the system.
S**
Super useful tools for working with refrigeration equipment
Super useful tools for working with refrigeration equipment
J**D
Great
Several years later, still works great for mini split systems
Trustpilot
5 days ago
1 month ago