


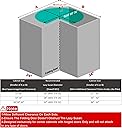


Dowell 4001 270 Base Corner Lazy Susan ,Double Rack
Product ID: 706470406
Details
- BrandDowell Kitchen
- ColorChrome
- Item Diameter28 inches
- Item Weight13 pounds
- MaterialMetal
Desertcart purchases this item on your behalf and handles shipping, customs, and support to GERMANY.
Dowell 4001 270 Base Corner Lazy Susan 270 Revolving Double Rack Material: Iron, Finish: Chrome Size: Dia.28"x(22"-31") For base corner cabindetent to ets with independently hinged doors Review: Makes my kitchen feel updated and clean@ - This is not the first time i've replaced the large corner cabinet lazy susan in a kitchen, but i will say this was definitely one of the easiest to install. All in all it is sturdy, clean and a little tricky, but easy, to install. If you want to read my install saga, keep going, if not, my review is positive and I would buy it again anytime. If you think you might need some tips for doing this yourselves (folks who don't think of themselves as particularly handy) then keep reading LOL All you will need is a drill, a phillips head bit, and an extension for the bit. The directions were okay, but i found that once i got the racks together, the rest of the directions didn't help much, but it was fairly intuitive. I don't know about other folks cabinets, but i found that once the door was off, it was easiest to assemble the entire rack, including the top pole and flange, and insert it into the cabinet. First though, i tossed the measurement directions that came with the kit and found it was easier to place one of the racks onto the bottom pole, put it into the cabinet to see how much room i actually had. then decided where i wanted it to go and how much clearance i wanted all the way around. I measured from the 45 degree corner in the front, marked with a pencil where the flange was, drew a circle around it, then pulled it out. i put everything together, hand tightened it down and then put it back in the cabinet. Be patient, it's like playing janga! there IS a way it will fit in, you just might not find it the first go round LOL OH! And make sure you put the top pole in becasue you can't fit it in later... or at least I couldn't! The whole thing will be tippy, so steady it best you can, (this is where an extra hand might have helped) and put the bit with the extension on the drill, as you'll need to go thru the wires to get the screws in, and then screw in the bottom screws. Then straighten the thing up a bit, as it will lean a little, and screw in the upper screws. VOILA! You are about to feel incredibly accomplished! And you should be! Now, we'll tackle those double door hinges next! Review: This is a great investment! - I’m so happy with this item. It’s so easy to install. Everything in this cabinet is now so well organized. I can see exactly what I have. There’s no need to empty everything out when I’m looking for something. I think it’s a good investment because I won’t end up buying duplicates because I can clearly see what’s inside. The shelves can be adjusted to rotate quickly or slowly. I like the slower spin so nothing tips over. This is a great product. I would buy another if I had another corner cabinet.

| ASIN | B009DDSZUC |
| Brand | Dowell Kitchen & Bath |
| Customer Reviews | 4.6 out of 5 stars 570 Reviews |
| Enclosure Material | Iron |
| Item Diameter | 28 Inches |
| Item Weight | 13 Pounds |
| Manufacturer | Dowell |
| Manufacturer Part Number | 4001-270 |
| Material | Iron |
| Maximum Weight Recommendation | 40 Pounds |
| Model number | 4001 270 28 |
| UPC | 818637016017 |
D**N
Makes my kitchen feel updated and clean@
This is not the first time i've replaced the large corner cabinet lazy susan in a kitchen, but i will say this was definitely one of the easiest to install. All in all it is sturdy, clean and a little tricky, but easy, to install. If you want to read my install saga, keep going, if not, my review is positive and I would buy it again anytime. If you think you might need some tips for doing this yourselves (folks who don't think of themselves as particularly handy) then keep reading LOL All you will need is a drill, a phillips head bit, and an extension for the bit. The directions were okay, but i found that once i got the racks together, the rest of the directions didn't help much, but it was fairly intuitive. I don't know about other folks cabinets, but i found that once the door was off, it was easiest to assemble the entire rack, including the top pole and flange, and insert it into the cabinet. First though, i tossed the measurement directions that came with the kit and found it was easier to place one of the racks onto the bottom pole, put it into the cabinet to see how much room i actually had. then decided where i wanted it to go and how much clearance i wanted all the way around. I measured from the 45 degree corner in the front, marked with a pencil where the flange was, drew a circle around it, then pulled it out. i put everything together, hand tightened it down and then put it back in the cabinet. Be patient, it's like playing janga! there IS a way it will fit in, you just might not find it the first go round LOL OH! And make sure you put the top pole in becasue you can't fit it in later... or at least I couldn't! The whole thing will be tippy, so steady it best you can, (this is where an extra hand might have helped) and put the bit with the extension on the drill, as you'll need to go thru the wires to get the screws in, and then screw in the bottom screws. Then straighten the thing up a bit, as it will lean a little, and screw in the upper screws. VOILA! You are about to feel incredibly accomplished! And you should be! Now, we'll tackle those double door hinges next!
S**Z
This is a great investment!
I’m so happy with this item. It’s so easy to install. Everything in this cabinet is now so well organized. I can see exactly what I have. There’s no need to empty everything out when I’m looking for something. I think it’s a good investment because I won’t end up buying duplicates because I can clearly see what’s inside. The shelves can be adjusted to rotate quickly or slowly. I like the slower spin so nothing tips over. This is a great product. I would buy another if I had another corner cabinet.
K**4
Amazing!
Installation was simple once I cut the cabinet shelf out. 28" looked really big but it was the correct size for the corner cabinet. It is strong and of good strength and quality. It has some plastic parts near the pole and im hopin since its part of the shelf support that it won't crack over time. Would've been nice if the whole thing was made of metal. We'll see in time. I'm 64, female and am so very proud of myself for installing! I thought my diy abilities were behind me! Lol So....if I can do this, anyone can! I highly recommend
A**K
Absolutely Perfect
First, let me just say that my 5 star review cannot possibly improve upon the other 5 star reviews in regards to the quality, value, and utility that this offers. Go read those. This is absolutely worth the price. The key distinguishing feature here over the plastic alternatives is the high basket lip, which allows you to pretty aggressively spin this without stuff flying off. And as others have noted, it is incredibly durable particularly considering how lightweight it is. I would like to add that there are criticisms about the instructions. I did not have this problem, as I did not have instructions with my shipment. However, it's pretty easy: 1. The larger tube is the base; the smaller tube is the riser. 2. There are metal pins that come in the hardware packet. These go through the holes in the tubes, and the plastic rings sit on top of them to provide support to the baskets. There is a small set screw whose job is to fit into the groove of the plastic hub on the basket. Do not tighten this against the basket hub; only tighten it until the screw fits inside of the groove so that the basket cannot be lifted up. 3. The plastic hubs have a threaded collar. You tighten this to adjust the tension on the basket. You can make it really tight if you don't want the basket to spin freely (eg you have to keep pushing the basket to move it), or leave it loose so you can spin the baskets while shouting "wheee!". 4. To install, put the larger tube inside your cabinet and at least one basket set on the tube. Locate it so that the basket can spin freely without interference. While in that position, use a sharpie to mark the location of the screw holes around the base. Then remove the assembly. Predrill the holes you marked. Now assemble the top and bottom (large and small) tubes, place it inside the cabinet, and drive your screws in to hold the bottom portion in place. Now push the top tube up to the underside of the cabinet, and mark the holes for the screws to hold that in place. (Note: you should in theory have a piece of wood across the bottom of your countertop. If not, do not attempt to drill into your countertop. Instead, go purchase a piece of plywood, cut it to the width of your cabinet, and secure to the bottom underside of your countertop with a very strong adhesive.) Now that you have all your pilot holes drilled, assemble the entire thing inside the cabinet, put the screws into the based and top to secure in, install the pins to set the basket height, tighten the set screws to lock the baskets into the hubs, and tighten the locking collars to the desired tension. Note that the key here is that you have to assemble it inside the cabinet. I recommend you do a practice assembly outside of the cabinet first, as it will be much less frustrating when you're not on your knees and crammed sideways into a small cabinet door.
D**N
Sturdy, but the instructions need serious help
This product was not TOO hard to install, and while it’s not as pretty as the original shelves that came with our cabinetry, it’s bound to be sturdier. Who cares, it’s behind a door. ONE BIG WARNING: the instructions are vague, and they DON’T really mention how to align the shelves. (“The sequence of A” is all they say. Go figure.) Do take some time, before screwing in anything, to examine the plastic ring collar near each shelf. You will notice a small notch on both. This notch is used to pause the rotation of the shelf, in order to close the cabinet door. It should be in line with the holes in the lower metal shaft (where those pins will go). Be sure to line up those holes on the shaft with the LEFT hand side of the cabinet doorway! Experiment with one shelf on the shaft before you screw anything in, you’ll see what I mean. There are more thorough reviews here describing this, too.
Trustpilot
1 week ago
2 weeks ago