✨ Upgrade your countertops, upgrade your lifestyle!
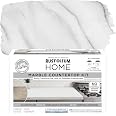
The Rust-Oleum 384964 Home Marble Countertop Coating Kit is a 72 fl oz acrylic paint set designed to transform indoor countertops with a realistic white marble finish. Featuring a simple 3-step application—base coat, veining, and satin top coat—it covers up to 100 sq ft and cures fully in 24 hours. Its satin finish provides durable, stain-resistant, and water-resistant protection, requiring no sanding or priming for a quick, professional-quality refresh.


| Brand | Rust-Oleum Home |
| Color | White |
| Finish Type | Satin |
| Size | 72 Fl Oz (Pack of 1) |
| Item Volume | 2.25 Quarts |
| Special Feature | Stain Resistant |
| Unit Count | 72.0 Fl Oz |
| Paint Type | Acrylic |
| Specific Uses For Product | Interior |
| Surface Recommendation | Ceramic |
| Indoor/Outdoor Usage | Indoor |
| Item Form | Liquid |
| Included Components | Can |
| Age Range (Description) | Adult |
| Is Waterproof | True |
| Model Name | Home Marble Countertop Coating Kit |
| Package Information | Bottle |
| Color Code | White |
| Full Cure Time | 24 Hours |
| Coverage | Covers up to 100 sq ft |
| Water Resistance Level | Water Resistant |
| UPC | 020066025267 |
| Global Trade Identification Number | 00020066025267 |
| Manufacturer | Rust-Oleum |
| Dry Time In Hours | 4 |
| Part Number | 384964 |
| Item Weight | 6.03 pounds |
| Product Dimensions | 6.63 x 6.63 x 7.63 inches |
| Item model number | 384964 |
| Finish | Satin |
| Item Package Quantity | 1 |
| Special Features | Stain Resistant |
| Batteries Required? | No |
M**E
Worth it! DIY done well!
This works beautifully. Our kitchen countertop was very old and was completely refreshed with this product! It gave us a very nice kitchen upgrade. My suggestions would be take your time and may want to design the marbling on paper first. But we are very happy with our new countertop! It looks so clean and so far has been very durable! Worth it!
L**N
Great for an easy DIY refresh
Since buying new countertops is out of the budget till next year we went with this kit. Easy to use, dry time was rather quick. I wish I had made the veins thinner and sponged more white to create more depth but overall not bad for a first attempt. We also did 3 coats of the top coat to help with durability.
J**S
Looks Great, But Requires Extra Product and Has Some Durability Issues
The Rust-Oleum Marble Countertop Paint Kit is a great concept and gives your counters a fresh, updated look without the cost of replacing them. The end result actually looked really good — the marble effect is convincing, and the finish has a nice professional feel.However, I found that coverage was not as strong as advertised. I was working with a standard-sized countertop and still had to purchase a second kit to get full, even coverage. It’s definitely not a one-box solution for most surfaces, despite what the packaging suggests.Also, after about 7 months of normal use, I’ve started to notice bubbling in the clear coat around the sink area, especially where it tends to get wet more often. While the rest of the counter still looks great, this raises concerns about long-term durability in moisture-prone areas.Overall, it’s a solid product if you’re looking for a budget-friendly makeover, but be prepared to buy more than one kit and keep an eye on how it holds up near sinks or high-use spots. With a little extra effort and care, it can still be a worthwhile DIY upgrade.
M**N
Product was partially dried at the time of opening!
This product was not as expected... first of all the color for the veins was very thick and after using the mist bottle it hardly diffused the color leaving thick lines. The veins are very hard to put on and after that sing the mist the white color bubbled, so we had to do it over again. After we re- did the process and we opened the satin top coat can there was a thick film of the satin top coat on top and even after stirring it left clumps everywhere. I'm not sure if the product I received was old but it ruined all the hard work done!No hapyy with the results ☹️
A**R
Looks Great, Easier Than I thought
We have some old white formica countertops in a ski condo that we were thinking of replacing. Since it is a galley kitchen we weren't too keen on spending big bucks to replace the countertops. This was one of the few DIY projects I have ever done that was easier than I expected (I have a general rule that things take 20% longer than expected which works well). This was a piece of cake. Instructions are idiot-proof. The only thing I did differently than the instructions (kind of by mistake) was blending the grey marbling lines by "dry-brushing" them afterwards with just a touch of paint on the tip of the brush. Fewer is more on the gray marbling lines to make it look authentic. The blending part is key to making the "line" look real; just play around with it. *Google some photos of patterns you like. You can always just paint the lines over and redo them til your happy. I would recommend this product.
C**.
So far so good!
The look of this turned out exactly the way I hoped. However, I’m unsure about the durability. After following all the steps exactly to a tee, several spots completely peeled the paint off when I was rolling on the top coat and accidentally hit the counter with the metal part of the roller. I’m hoping it’s just because it hasn’t had the full 7 days to cure, so we will see how it lasts.As for the look, it turned out great. The key is to dabble the gray paint in a line with a large paint brush (one you would use to paint walls or baseboards) then spray enough water to where the mineral paint spreads on its own. Then go back in with a paintbrush and napkin to clean it up.Only giving 4 stars because of how easily the white coat peeled away after slightly hitting it with the roller. The base coat was drying for 36 hrs at that point and I don’t think it should’ve peeled away that easily. However, the look of this product is exactly what I wanted!UPDATE: I 10000% REGRET USING THIS KIT!!!! I feel like if I just breathe wrong, the countertops chip. There are literally hundreds of chips and scratches allllllll over the counters after just a couple weeks of light use. I’m so upset!!!!
A**R
Great!
Love! It came out amazing. I followed the video. I did use an epoxy for the top coat instead of the second coat it comes with.
H**Y
Amazing
This stuff is amazing! Looks and holds up so good! I redid my bathroom vanity 1 year ago and it still looks new!
Trustpilot
4 days ago
1 day ago