


🛠️ Work smarter, not harder — the ultimate portable powerhouse for pros and DIYers alike!
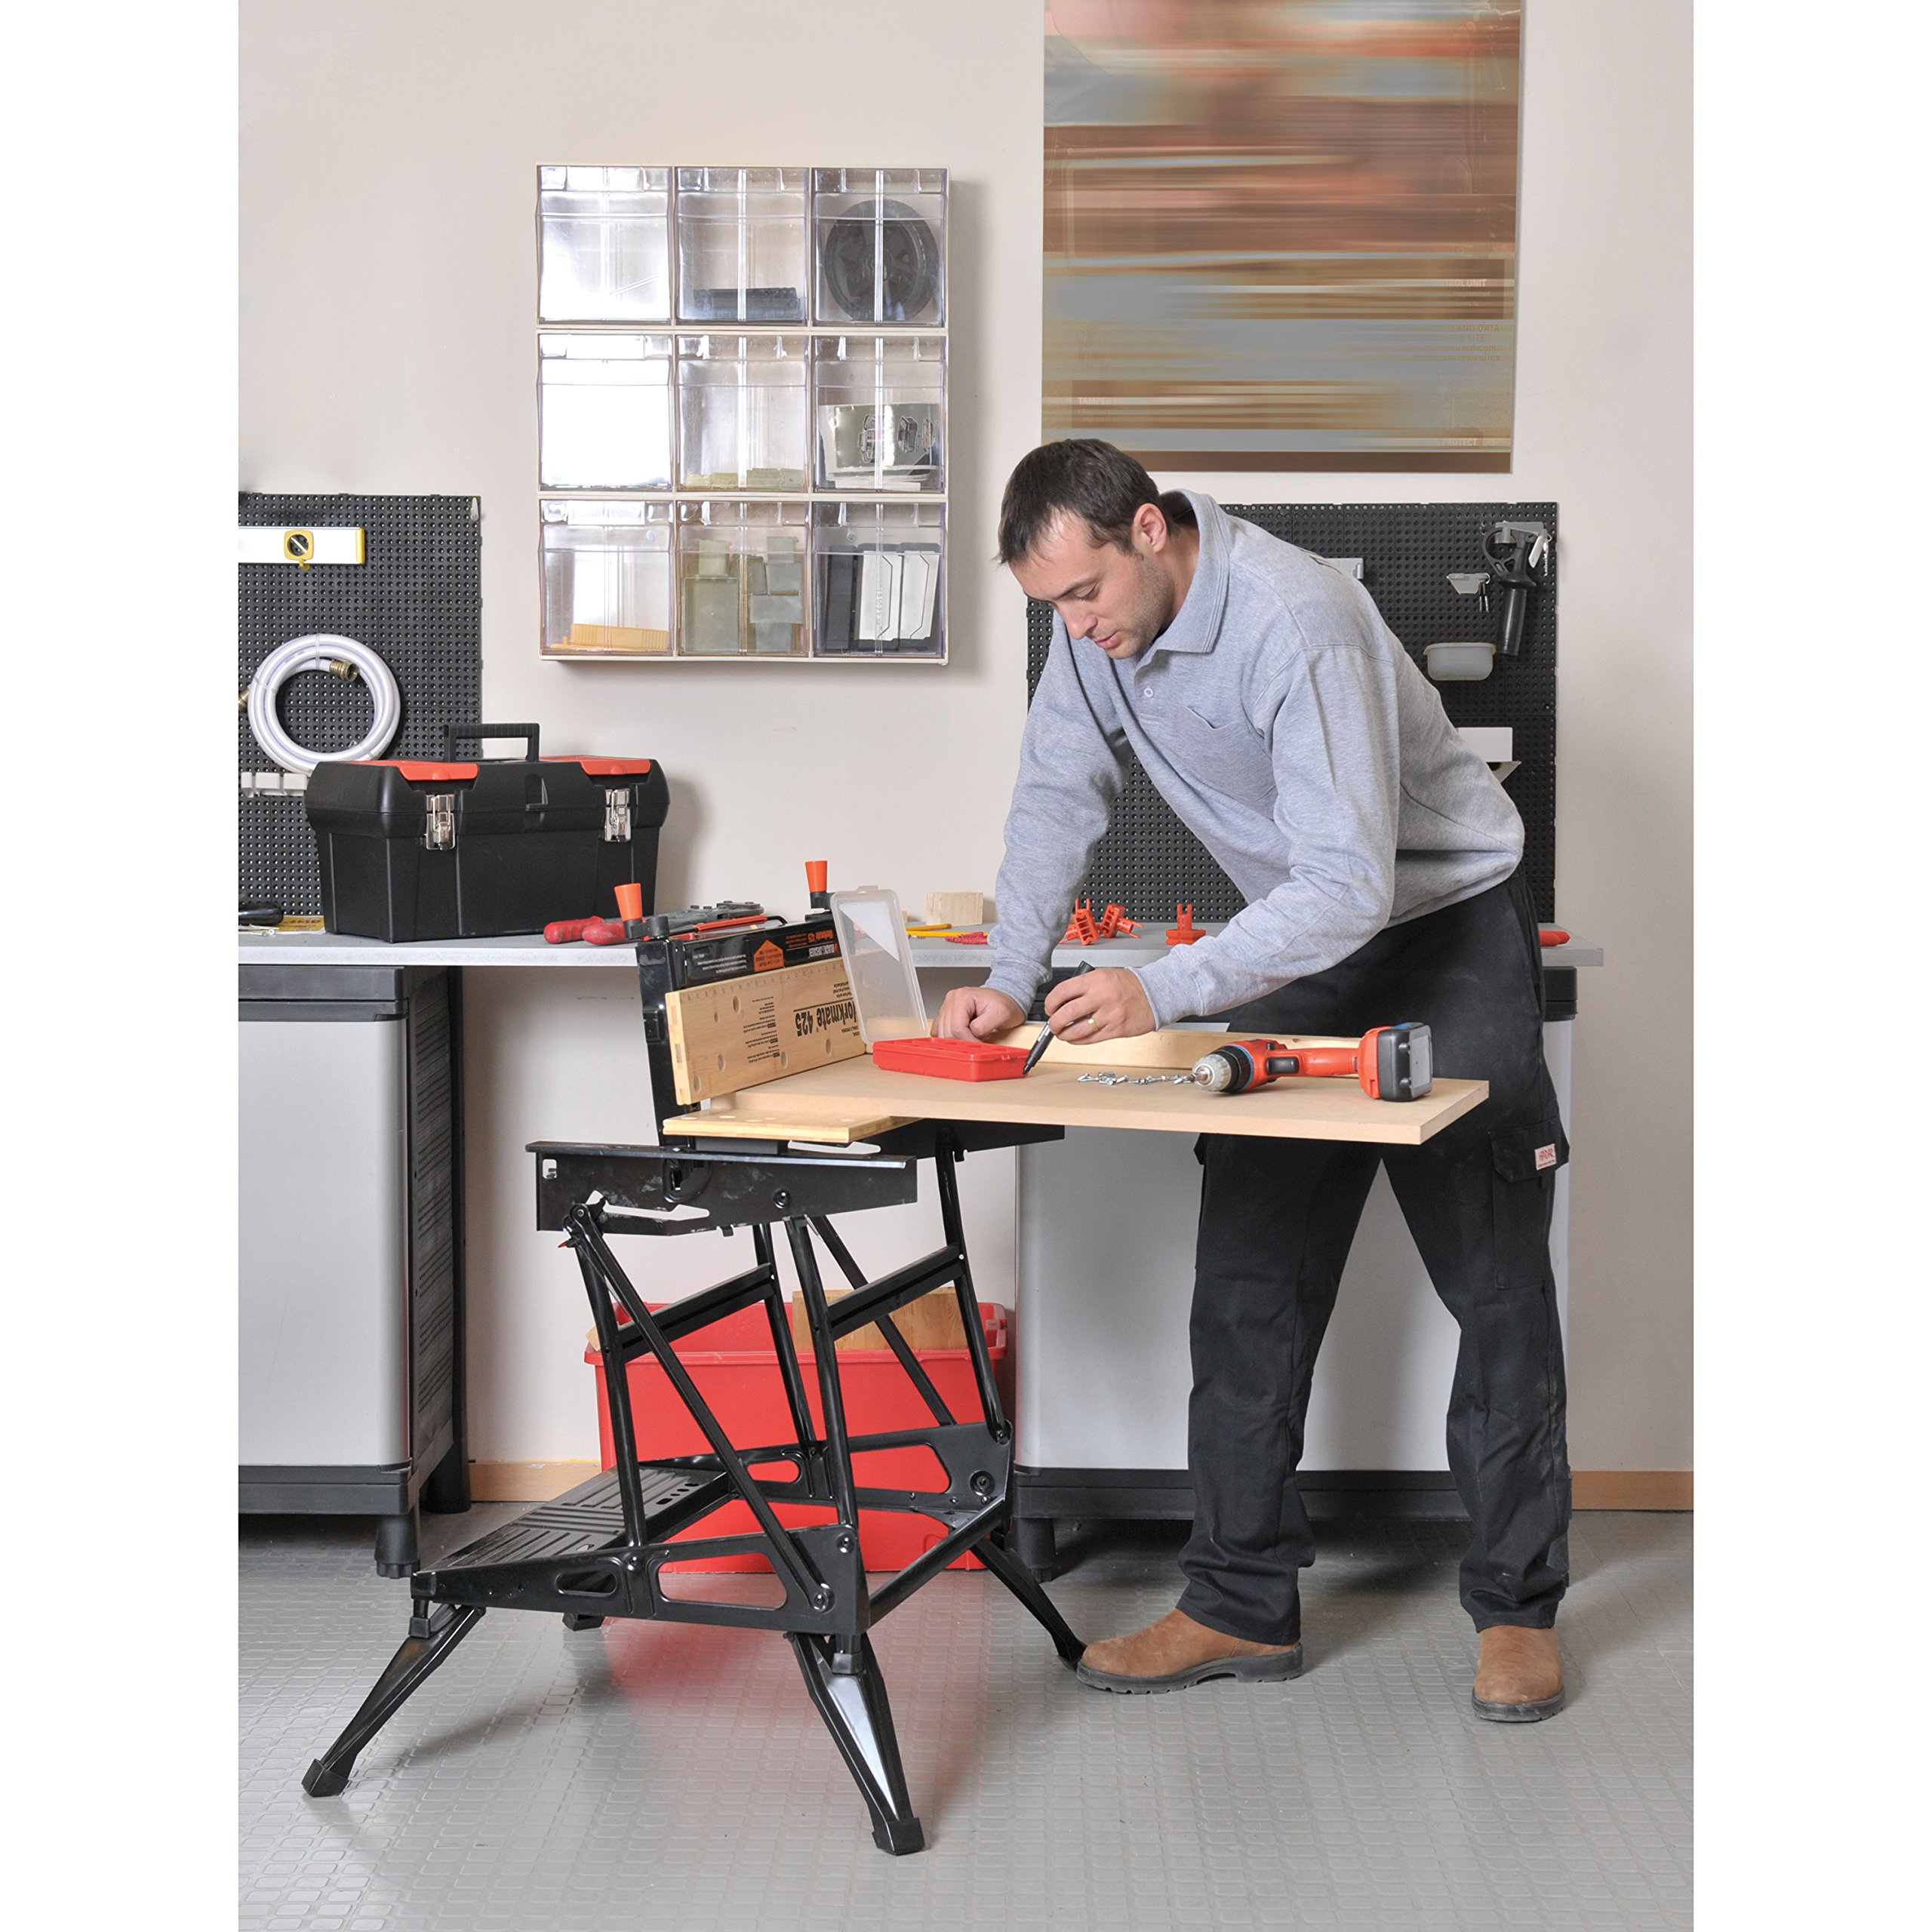
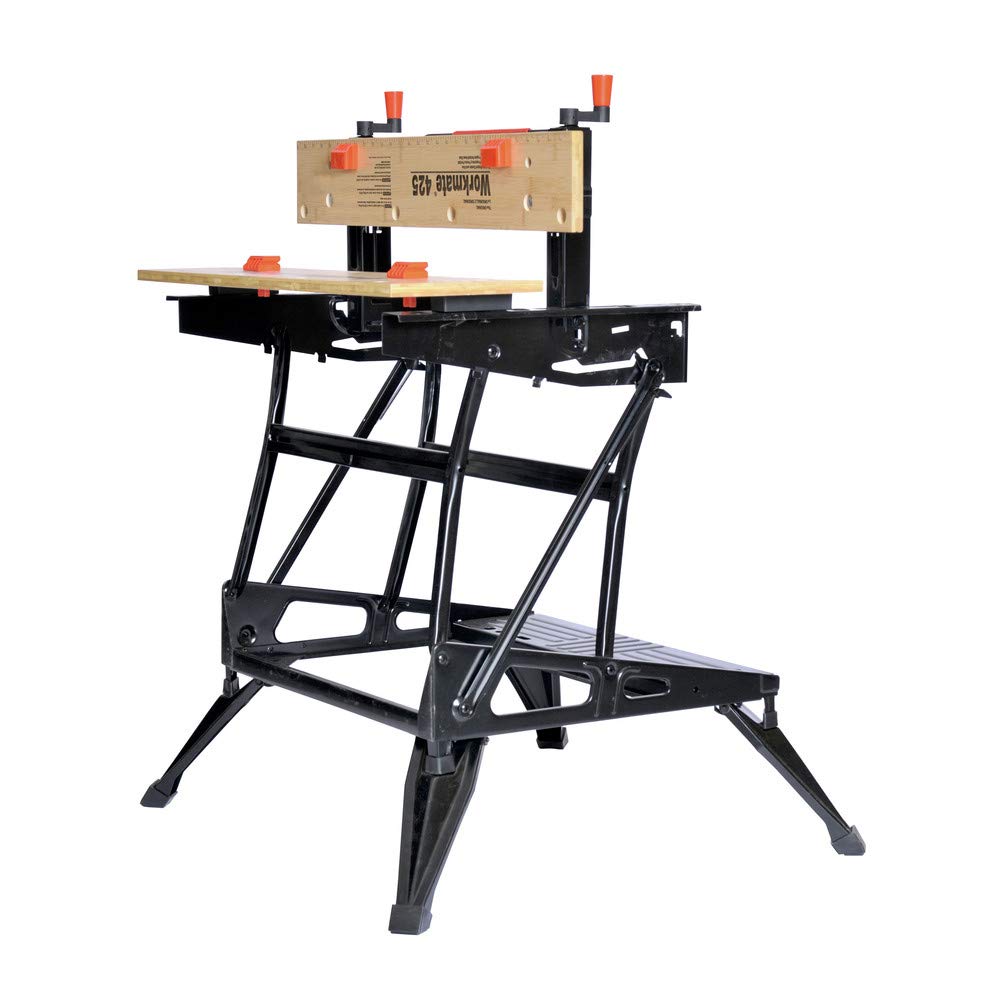
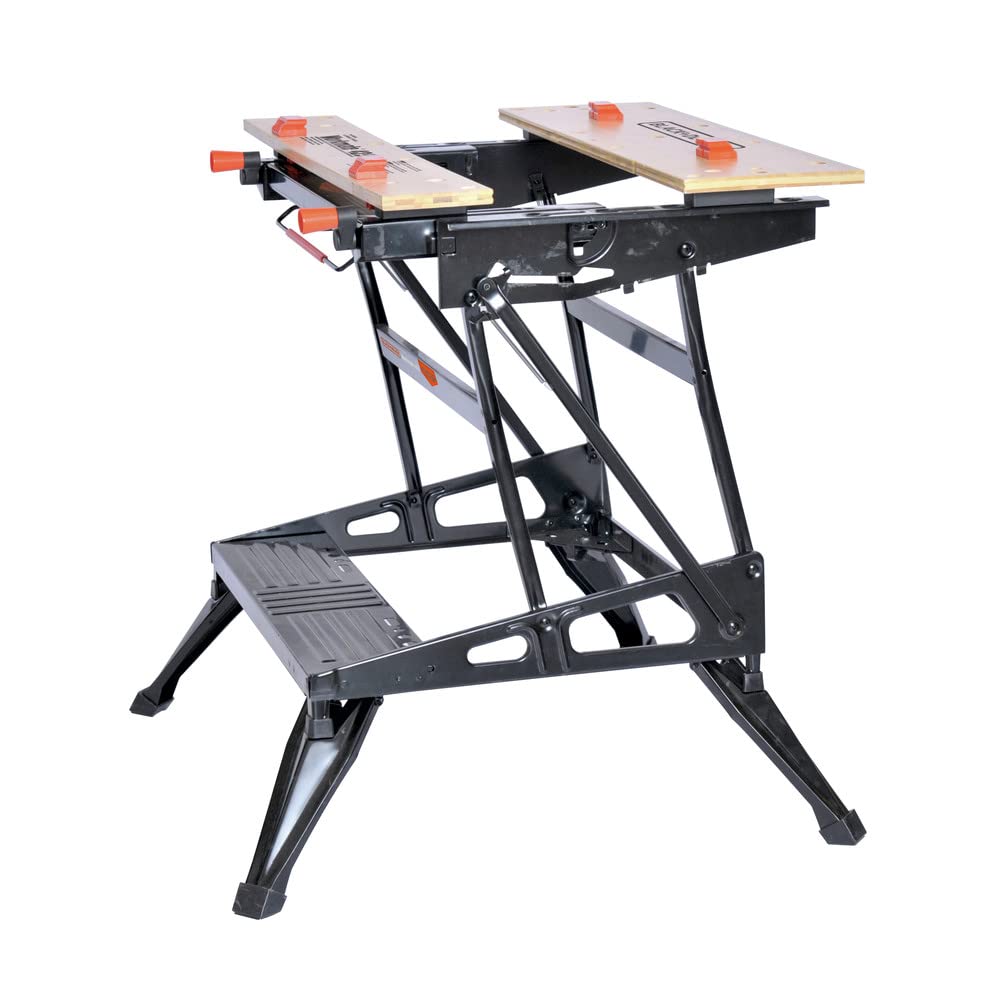
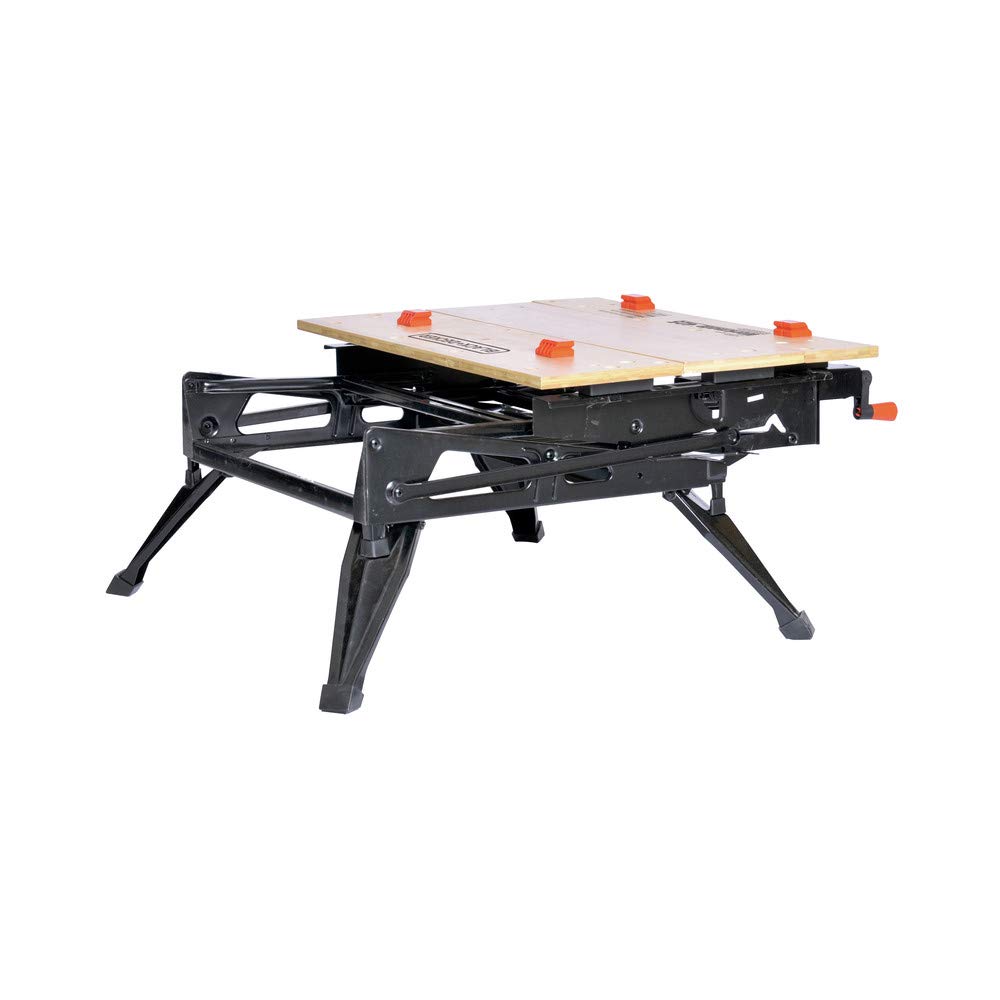
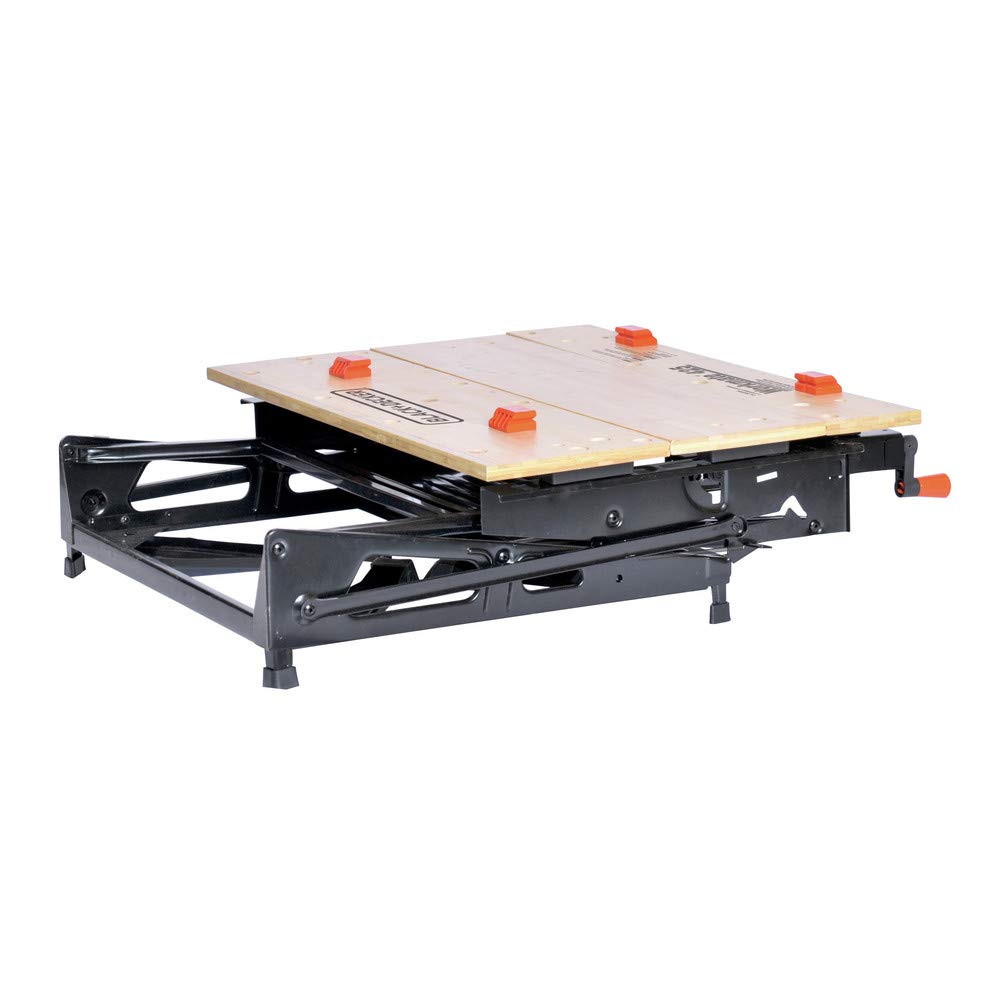
The BLACK+DECKER Workmate WM425 is a portable, heavy-gauge steel workbench designed to support up to 550 pounds. Featuring dual height adjustable legs, an innovative one-handed clamp system, and adjustable jaws with swivel pegs, it offers unmatched versatility for clamping various shapes and sizes. Its foldable design ensures easy storage and portability, making it an essential tool for carpenters, woodworkers, and home improvement enthusiasts. Backed by a 2-year warranty, this workbench combines durability, flexibility, and convenience in one sleek package.
| Material | Blend |
| Brand | BLACK+DECKER |
| Color | Black |
| Finish Type | Brushed |
| Base Type | Leg |
| Frame Material | Alloy Steel |
| Load Capacity | 550 Pounds |
| Assembly Required | Yes |
| UPC | 012301046366 028873494252 |
| Minimum Height | 30 Inches |
| Global Trade Identification Number | 00028873494252 |
| Assembly Instructions Description | Easy to follow, simple assembly instructions required. |
| Manufacturer | BLACK+DECKER |
| Part Number | WM425 |
| Item Weight | 36.2 pounds |
| Product Dimensions | 29.25 x 8.88 x 29.5 inches |
| Item model number | WM425 |
| Is Discontinued By Manufacturer | No |
| Size | One Size |
| Style | Classic |
| Finish | Brushed |
| Pattern | Solid |
| Shape | Rectangular |
| Power Source | hand_powered |
| Item Package Quantity | 1 |
| Special Features | Vise |
| Included Components | WM425 Project Center(4) Swivel Pegs |
| Batteries Included? | No |
| Batteries Required? | No |
| Warranty Description | 2 year warranty. |
| National Stock Number | 5140-01-458-4784 |
C**Z
Awesome workbenches (We have 3 now! (x1 225 and x2 of the 425s)
These go together relatively quickly. We have used them on numerous projects, we have the 225, and x2 425's. They come in very hand and are extremely versatile. The rear board comes off or can be re-located to meet your needs, the feet fold under and there are shorter feet in each corner with then replace the folded feet. A small roll pin holds on the handles. As long as you don't need to remove them a simple hammer and the included plastic "wrench" is all you will need to assembly the tables. The edges (facing each other) are grooved). The idea is to help hold material. Another vertical groove is included to allow you to put in a round object and fit in the vertical groove (about 1/4" deep). With a couple quick lever release/catches this will fold flat. While this is mostly just stamped steel with some plastic guides and the ??bamboo?? top it’s a very nice quality work bench. One thing I will mention with this is the second 425 I purchased had a slightly chipped wood work surface on one of the 3 pieces. Not a big deal, but wanted to mention it.
K**Y
Love it, easy to assemble and fairly light.
I ordered mine from HD. It arrived in two days with no packaging problem. It took me less than 15 minutes to assemble. It took me longer to lightly grease the sliding and moving parts. I greased the plastic belt that is used to synchronize the cranking, the bottom of the front blocks, the vise screws threads, the hole of the vise screw so the pin would tap in easier, all the hinges and springs.It seems that a lot of people had problems putting the pins in. To put in the pin I greased the hole in the vise screw, greased the pin, squeezed one end of the pin, ran the pin in and out of the vise crank hole to loosen the hole. The trick is to turn the vise screw so the hole is pointing up, lightly grease the hole AND PUSH the vise screw towards you. (This is important cause if you don't then when you push and tap in the pin into the vise crank onto the vise screw the holes might not be aligned and go in.) Once you push the vise crank onto the vise screw, align the holes, push the pin into the vise crank and feel that it is seated(onto the groove) to the vise screw hole (make sure that the vise screw is still pushed towards you). Put your hand under the vise crank to hold it while you now lightly tap the pin with a small hammer. Use your hand to hold it up while you're tapping. Do the same to the other vise cranks.Step #7 says "Install the front vise jaw on top of the TOP BLOCKS". It should be "FRONT BLOCKS" not top blocks.You can use a ratchet instead of the included wrench to tighten the 6 screws to the blocks. It will be easier. Just tighten slowly. Do not over tighten the front blocks or it will not slide easily forward or backwards when you turn the crank. You might even break the plastic vise crank and/or belt while trying to turn it if you over tighten the screws to the front blocks which I think many people did after reading their reviews not knowing why their crank broke and blaming it on where it's made and the product.Lightly grease the vise screws, the bottom of the front block and the belt. Then turn BOTH cranks with BOTH hands several times fully back and forth to loosen it otherwise the belt might snap if one of the vise screw is too tight.When it's standing on its side while it is folded up, it doesn't seem to be too steady so what I did was I added 4 leveling rubber feet to the bottom. I drilled 4 holes, tapped it and screwed in leveling rubber feet. Now it doesn't tilt over, it doesn't mar or scratch the floor or damage the bottom of the workbench when standing up. I made my own one time tap screw since I didn't own any. I got a bolt with the same screw threading, used the workbench and clamp dogs to clamp on the bolt and used my rotory tool to slices 4 slots on the bolt. Then drilled a hole slightly smaller than the threading into the bottom of the workbench , used a ratchet and slowly tapped the hole to create the threading. (See the pictures that I added)The only issue I had was that the middle board was slightly warped other than that everything else was perfect. I called customer service and they said they will send me a complimentary replacement and should receive it in 7-10 business days.Hope this helps people who are having a hard time assembling it and issues with the boards.And for less than $100 what do you expect a tank?Loving this bench and their customer service.update..6/3/13 .... received the new bamboo clamp boards today. They sent me all three boards not just the warped one that I told them about. Great customer service. Still loving the workbench. So versatile.
D**O
Great product but a few issues with assembly
My husband had had one of these years ago but had given it (well-used) to a friend when he'd moved and no longer had space for his workshop. We got married a few years ago and now had space, so he asked for it for Father's Day. We assembled it that night, but ran into a couple of things we consider design flaws, most notably, the attaching of the crank handles.The holes in the handles and the holes in the metal rods onto which they need to be attached just couldn't be made to line up correctly. You need to be able to force a spring steel rod through these two holes (compressing the steel while doing it is designed to make a nice tight connection) but since the fit is supposed to be so tight, there's no way to do it unless these two holes align perfectly. After a very frustrating half hour, we finally found some bolts and nuts that did the job.Other than this, and the fact that he felt it wasn't as rock-solid as the other one he had (20+ years ago), he was very impressed with the design, quality and versatility. And as far as the rock-solidness, he still feels it's a very sturdy and generally well-engineered item - in fact, they've actually improved it in a couple of ways since the earlier version.
J**P
Blood Sweat and Tears
The product arrived exactly on the dtae promised, I actually saw the UPS truck stop, so I was able to open the door and have the delivery man put the box where I wanted it. After I got the table out of the box, I turned to the instruction sheet. I found the instructions VERY difficult to follow, although it was obvious to me what steps had to be taken and the order in which they should they should be taken. After some choice words to the unknown writers of the instructions, I was able to put together a "Thing of Beauty". I have used the equipment on several projects and it has performed perfectly. Thank you for an excellent, usable, professionable product, and I only voiced my frustration about the clarity of the assembly instructions to help you fix them for future purchasers of an EXCELLENT product.
J**Y
Newer Workmate poor construction, poor features, very inflexible
The orange stops are too high to clamp a board less than 7/8" thick, making sanding 3/4" trim impossible with a belt sander. The overall metal is very light compared to the 79-001 BD workmate that I replaced. The plastic belt that binds the two crank handles together appears to be something that will strip out over time (the original had a solid metal worm gear). Because it is so light, when sanding a board extended 2 feet over the bench, it causes the bench to want to tip (no issue with heavier original bench). There is NO WAY to put the stops in any of the holes to clamp down a board 3" or 6" wide. To do this I will need to drill more holes. And having to remove the boards to place them in different slots is very inconvenient compared to the 79-001workmate. Wishing I had returned this newer one and looked for a good, used original.
Trustpilot
3 weeks ago
1 month ago