Description
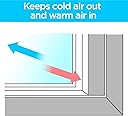
🔥 Seal the cold out, keep the warmth in — winter-proof your windows like a pro!
- FAST SIMPLE SETUP - Install in minutes—no pro skills required, just peel, stick, and shrink.
- ALL SEASON SECURE SEAL - Scotch double-sided tape locks in warmth all winter long.
- CONDENSATION FROST DEFENSE - Keeps windows clear and cozy by preventing moisture buildup.
- CUT HEATING COSTS EFFORTLESSLY - Slash your winter energy bills with airtight insulation.
- CRYSTAL CLEAR WRINKLE FREE VIEW - Heat-shrink film ensures a sleek, transparent finish.
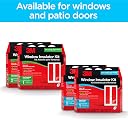
The 3M Indoor Window Insulation Kit includes heat-shrink film and Scotch double-sided mounting tape to insulate five 3'x5' windows. Designed for easy DIY installation, it creates an airtight barrier that reduces heating costs, prevents frost and condensation, and maintains crystal-clear visibility throughout the winter season.