🔧 Break out your Pi’s potential with precision and ease!
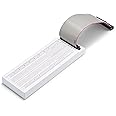
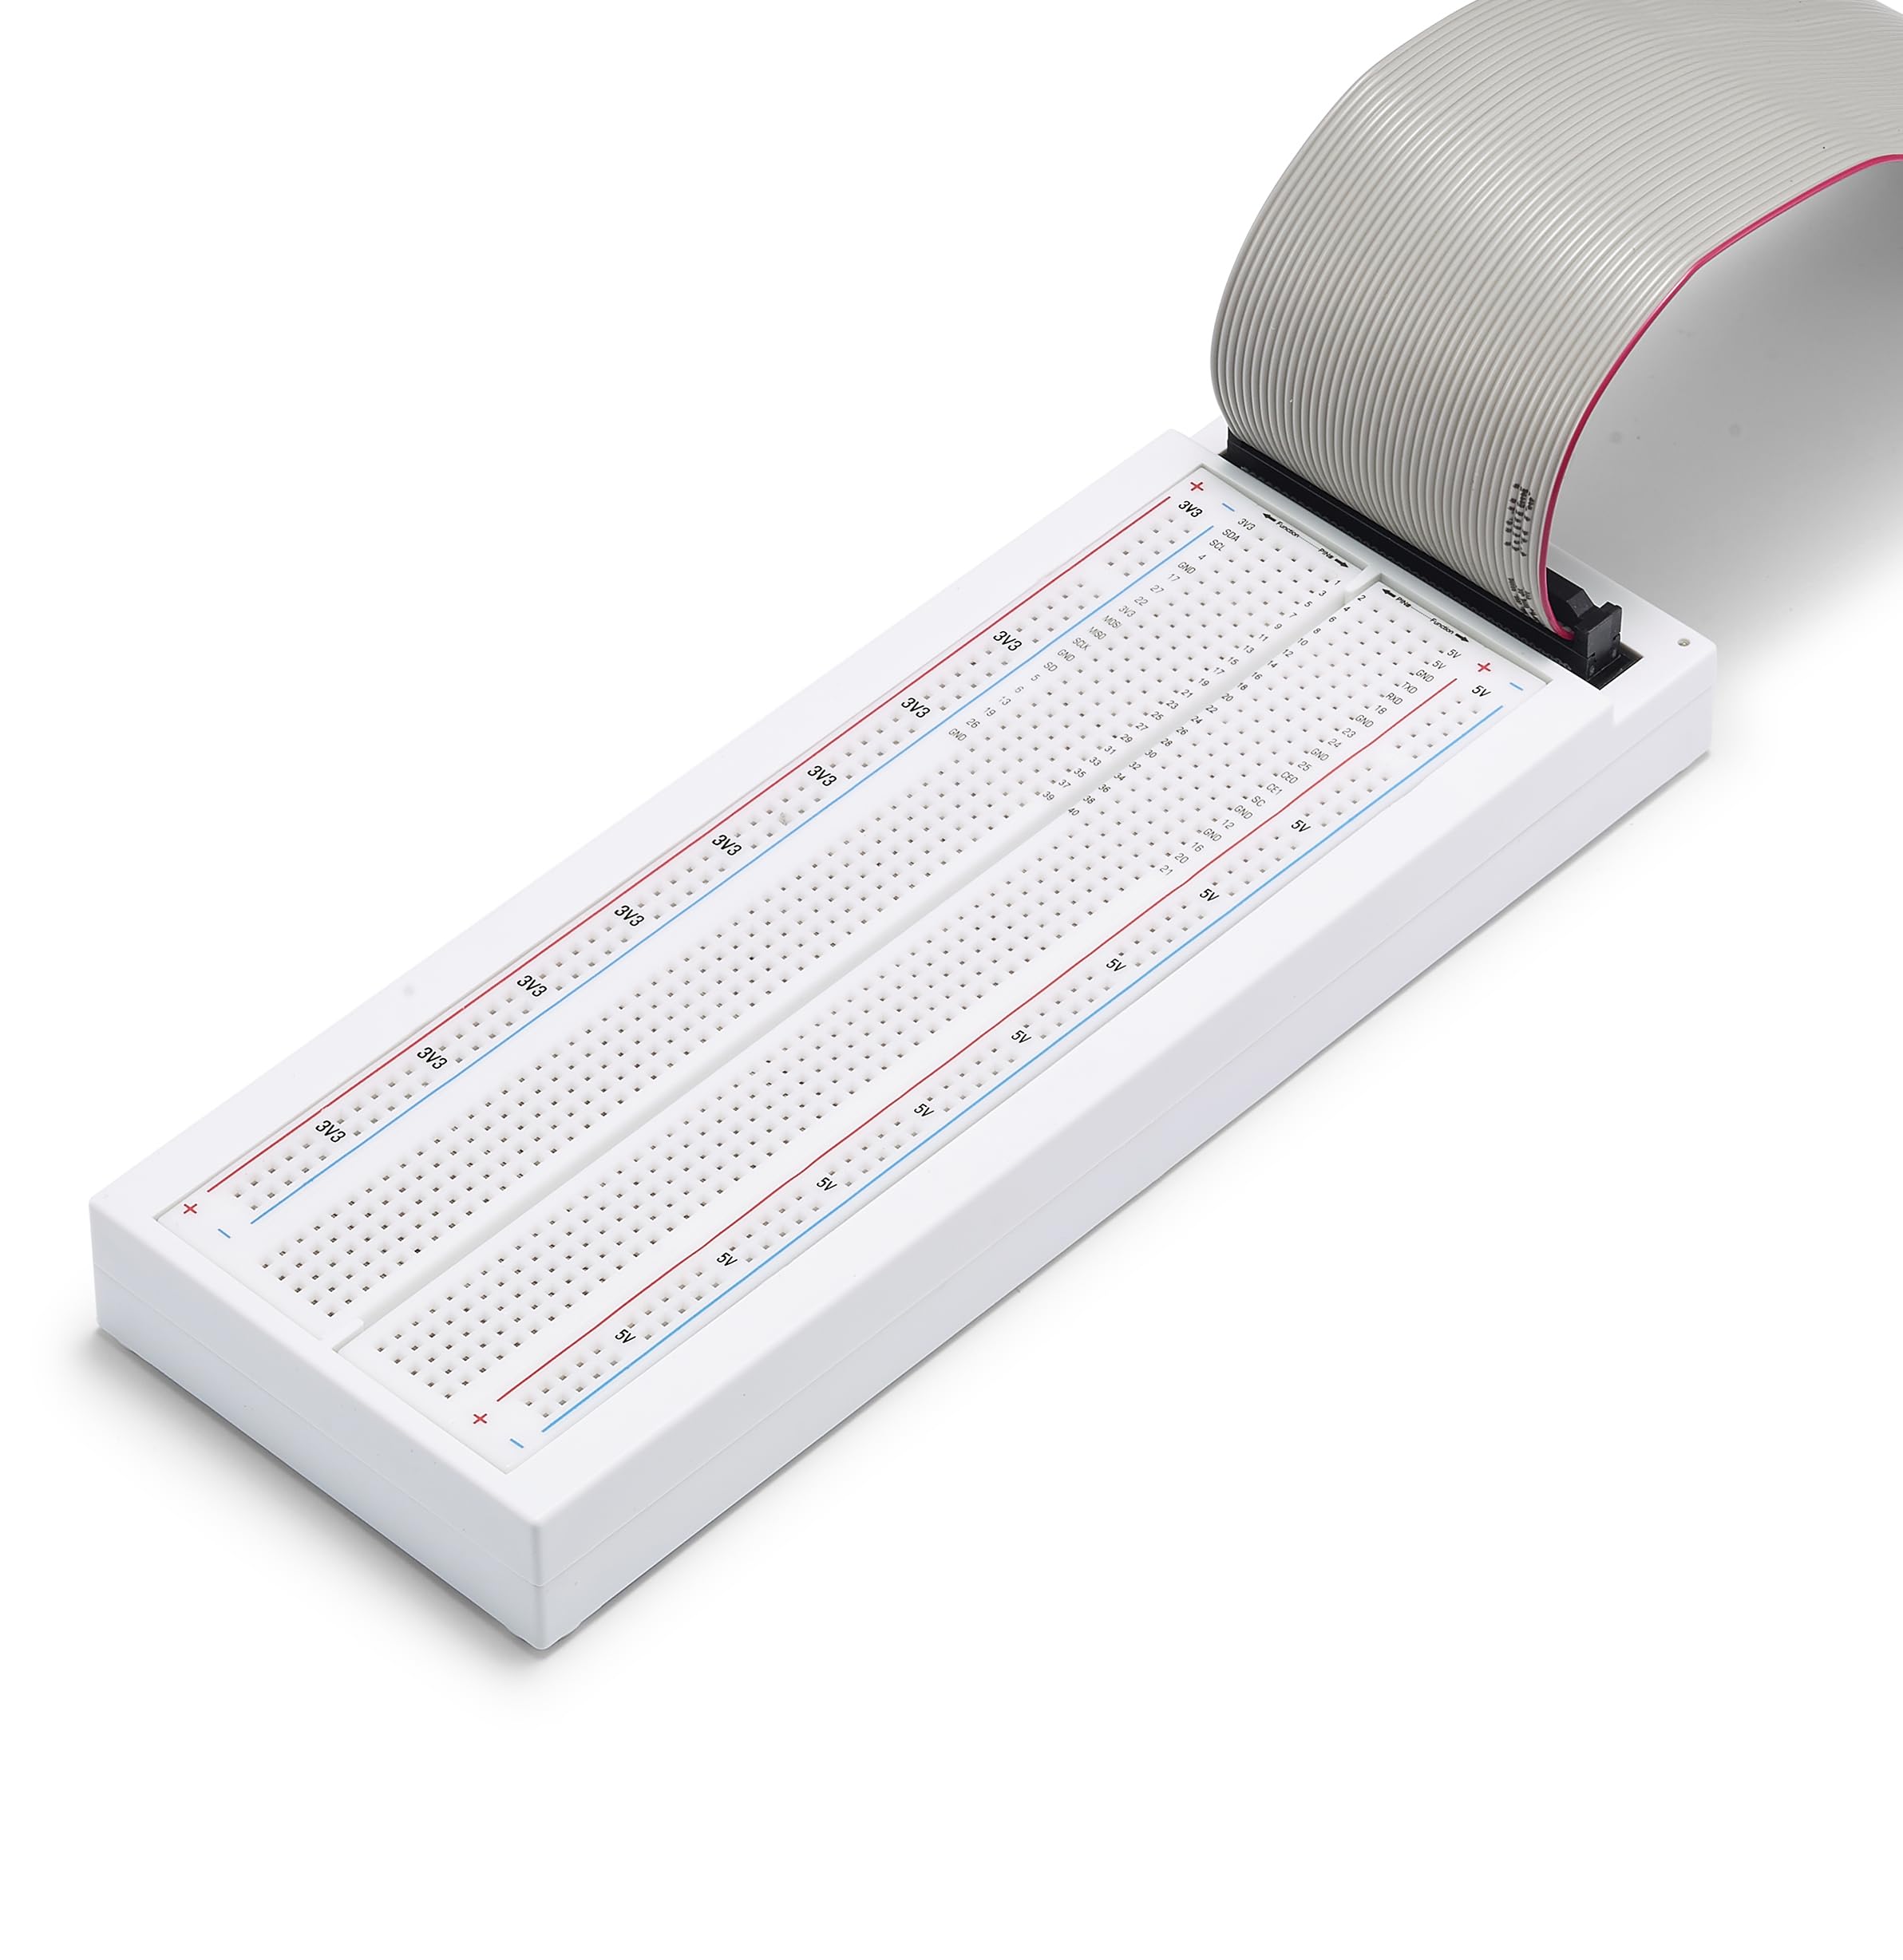
The Vilros Broken Out Breadboard for Raspberry Pi is a precision-engineered prototyping tool featuring a fully open, soldered breadboard with clear pin markings and an included 40-pin GPIO cable. Designed for seamless integration with any Raspberry Pi 40-pin header, it offers a compact, lightweight, and durable solution made in the USA to accelerate your hardware projects.
RAM | LPDDR4 |
Brand | Vilros |
Series | Broken out Breadboard |
Operating System | Linux |
Item Weight | 7.4 ounces |
Package Dimensions | 8.43 x 2.95 x 0.94 inches |
Processor Brand | Broadcom |
Manufacturer | Vilros |
ASIN | B0CP1BTSX2 |
Country of Origin | USA |
Date First Available | November 26, 2023 |
B**T
It's just quality. I want some tiny boards that clip onto th sides or bottom.
Sensor development.
R**N
A Must for RPi Tinkerers
This is by far an absolute must for anyone that works with the RPi pins for external control. Of course it is not meant to be a permanent fixture (especially if you have your cooling fan running off of the header pins) but rather for experimentation until you have a solid design for more permanent connections.The only thing I don't like is there is no instructions, pictures, examples, etc for which direction you should connect the cable to your RPi header. As can be seen in my pictures, it is possible to connect it either way (I did note in my pictures which direction it should be in). And since they parallel the 5V rail and grounds pins (i.e. they are physically connected on the breadboard itself making the breadboard capable of higher current draws which is a good thing), reversing the cable could easily cause damage to your Pi because of this (like total permanent failure). For this alone I subtracted 1-star even though I really like this breadboard.I would've liked to see some type of direction or label or anything on the cable itself (besides the red colored wire that is typical of these types of ribbon cables) that directed you to know which way to plug it in. As great of a tool this board is, if it ends up permanently damaging your RPi because of this...you won't be happy with it at all. So make sure you know which way to plug the cable into the RPi header before starting it. Or better yet, take some red fingernail polish and paint directly on the header the side that goes towards the power pins as a reminder.Aside from the cable direction issue, this has definitely become part of my RPi toolbox and will get quite a bit of use. No problems recommending it...just make sure you plug the cable into your RPi in the right direction is all.
S**S
Definitely needed
Makes it much easier to prototype with Raspberry Pi.How many times have you run into an issue with a new i2c device you are testing, and cannot be sure you wired correctly? I have done that many times than I want to admit.This breadboard has a pinout section for the 40-pin IO, and also a regular side, actually two sides for 3.3V and 5V power for other electronics. (Though I probably don't need to say be careful on these and not burn out your board).
F**R
MUCH better than T-breakout board with half size breadboard!
This gains back 5 holes per row on a half-sized breadboard over a T-breakout. Particularly helpful if you have projects with multiple I2C or SPI sensors/devices. The holes are nice and firm with solid connections that give smooth insertion and removal. This is not some cheapo breadboard. It is considerably heavier than a regular breadboard, probably twice the weight. It has nice little pads on the bottom so it doesn't slide around on a workspace.The labels could stand be a bit larger and darker. Or maybe remove the pin numbering labels on the inner column altogether and just repeat the function label there as well. That would be much more useful than numbering those rows, but there isn't really space for the function labels on the inner columns. I wonder if they could have swapped the power busses and the bezel space to make larger, more readable labels.I made the mistake of getting the full sized simply because I'm so used to needing to use full sized with a T-breakout and then have to extend down to the bottom of the board for space. This eliminates that entirely, so I may well buy the half-sized too. If they come out with a version with better labels, I would definitely buy a half-sized board.
D**D
Great for prototyping projects
These are some great little boards for working on projects before you make your end product. Everything fits well and the board is made well too.
D**R
Perfect breakout breadboard
I really like that it has the pin outs labeled on the board, makes things so much easier for beginners such as myself.
J**Y
Handy build. Tiny labels. Needs better assembly.
I like having the 3v3 and 5v rails broken out, super handy.The breadboard lanes are also double labeled with both function/GPIO number, and their pin number. Makes wiring things up a lot easier. Very tiny letters though.There's also a pinout reference on the bottom of the acrylic base.The breadboard isn't setting flush on the acrylic platform. Some of the spring clips are pulling out of the breadboard. I pulled the board and added a couple layers of VHB tape to the top area so it sits level and has good support.The soldering to the breadboard strips is mostly nice. A little messier on the voltage rails.They should probably mention that the red stripe is Pin 1. This is important for orienting the cable correctly on the Pi side where there is no key.
D**F
Easiest way to test your Raspberry Pi circuits
The Raspberry Pi has revolutionized the design of electronic devices. As electronics advanced, it was becoming harder for people to design and implement their own circuitry, as new components and methods required more specialized tools.The Raspberry Pi is an affordable small computer with lots of options for interfacing to your circuits. Access is via a 40 pin rectangular header, giving access to the GPIO bus. Inputs, outputs, and voltages can all be accessed through the GPIO bus.The Vilros "Broken Out" breadboard is a conventional prototyping breadboard with holes for component leads and wires, and buses to interconnect them. This one is exceptional because it comes with a 40 pin connector already connected. Plug it into your GPIO bus and all the signals are easily accessed for your own custom circuits.The breadboard is good quality and feels rugged. The holes are marked with the signals they carry making it easy to use without having to trace them down. Because this uses a ribbon cable instead of a "hat" board, it can be used where the auxiliary board won't fit. It's a great inexpensive boost for experimentation with the Raspberry Pi.
TrustPilot
vor 1 Monat
vor 3 Wochen