🎮 Unleash Your Style with eXtremeRate!
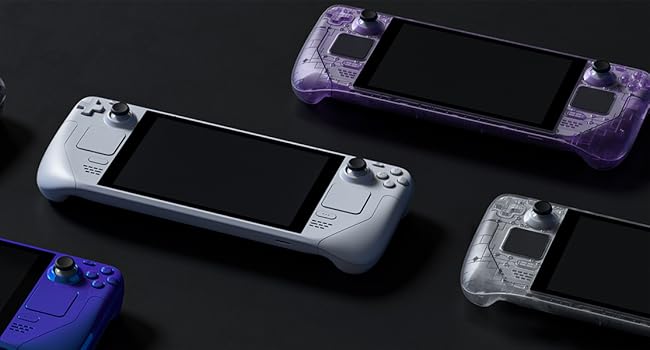
The eXtremeRate Custom Faceplate Back Plate for Steam Deck is a precision-engineered replacement housing designed specifically for the Steam Deck LCD (2022). Made from durable ABS material, this customizable shell comes in a stunning clear atomic purple color, allowing users to express their individuality. The package includes everything needed for installation, making it a perfect choice for DIY enthusiasts looking to enhance their gaming experience.


J**L
Very nice shell, but a complicated swapping process
Very impressed with the quality and fit of this shell. Everything is molded exactly the same size and dimensions as the Valve shell originally. It looks great, has a fantastic feel and surface finish, the buttons all fit together perfectly and work as expected, the instructional video is *very* thorough and good. I'm particularly impressed with the detail of the shell, it includes replacement and color correct pieces for every single button, including the power/volume buttons, trackpad covers, the shoulder buttons, etc. Most of the time I've seen console replacement shells they usually only replace the "main" parts they can get away with. This is a super thorough kit! My only complaints, if any, are that the screws given with the kit are just jumbled together in a single bag and it's very difficult to tell which ones are supposed to be used where. That said - and this is absolutely no fault of the replacement shell - this is a *really* intricate process to totally disassemble the Deck. Valve made the thing pretty repair friendly, the entire console can be disassembled with screws, *except* the screen. The screen is adhesion-ed on to the console, removing it is a stressful and frustrating process, and you risk damaging/breaking the screen in a couple ways. There's also quite a few fragile ribbon cables inside with very small and finicky latches, pay attention to how the latches are flipped up and the cables removed, don't yank on them too hard! The instructional video included with the kit is REALLY good, it's also REALLY long, don't skip it, don't try and find some shortcut, spend the time to sit down and follow along. A few tips from my swap: - Keep your screws really organized, I have a magnetic screw organizer mat, but some small bowls or piece of cardboard with some tape on it also works great. Don't mix the screws up! - When you remove the screen, be VERY careful not to stick the guitar pick/spudger too far under the screen, the instruction video says "don't do more than 3mm" but doesn't explain _why_ - the ribbon cable connecting the screen's panel to it's controller is very close to one of the side edges, it's very easy to damage especially when you're jabbing in there with a metal pick to try and pry the screen loose. Damage that cable and you'll need a whole new screen!!! - Replacing the trackpad covers is the only other really difficult part, the trackpad sits on a funky wavy spring along with it's vibration motor for the haptics feedback, then the cover with the actual "tracking" part is snapped on top, there's several ribbon cables and sensitive springs around it, so go slow and take your time! Use a hair dryer or heat gun to warm up the top of the trackpad before removing it from the adhesive - Highly recommend getting a couple nicer spudgers or guitar picks for disassembly, the ones included in the kit are pretty cheap
T**E
Stellar product
I purchased this with absolutely no experience in disassembling electronics, and was able to successfully complete this without causing any serious damage. I feel that this frame is higher quality than the stock model, and looks really nice overall. The guide video provided does an amazing job at being clear about how to safely remove pieces, or reattach them. I did have a few instances where it felt the components were easier to remove in the demonstration than they are in a stock model, but they still provided a good guide. I do have some words of advice for anyone interested in doing this themselves. 1. Keep track of your screws. I labeled and stored my screws throughout the entire process, which majorly helped when it came to reassembly. 2. Be extremely patient during screen removal, it is ridiculously scary and stressful, and much harder than it looks in the video, I would recommend buying an iOpener, as a hairdryer with the suction cup provided was simply insufficient to remove the adhesive and lift the screen. 3. Be careful when cleaning the adhesive residue off of the screen, I unintentionally scratched up my bezel, which is fortunately only a cosmetic issue, however if that matters to you, then practice hefty patience and caution at this step. 4. Be careful of your cables, multiple times I had to backtrack because I trapped cables under components. 5. Use a heat gun, hairdryer, or iOpener if any adhesive feels like it won’t come away safely, it’s not worth the risk. 6. When working on it you can put the deck face down in its case to make sure you avoid damaging the joysticks. Finally, I found this project to be fun and well worth the effort, but I would not recommend it to anyone who is impatient, or can’t handle stress well. I spent about 7 hours working on this, and I would recommend anyone attempting to do this to prepare for even longer.
W**S
Decent Custom Plate with Some Installation Challenges
The Extremerate custom Steam Deck plate looks good overall, but the installation process is not for beginners. It took me about 70 minutes using all the provided tools. The suction cup requires finesse and dexterity, and the included ring is useless for the cup. The screwdrivers are also not great, and while the pick works, it takes real skill to avoid scratching the back of the screen. A few important notes: The directions are incorrect—you do not need to remove the thermal tube from the processor. If you have the right tweezers, you also don’t need to disconnect the Wi-Fi or speakers from the motherboard. Removing the original adhesive took about 20 minutes. The shell itself arrived with several small imperfections, and the plastic is slicker than the original shell or the JSAUX shell I previously installed. Update after 1 year: I sold the Steam Deck this was installed on, but when I did, the plate still looked the same as the day I installed it. The adhesive for the screen held up very well, which is a big plus. Pros: Custom look for Steam Deck Adhesive holds up well over time Still looks good after a year Cons: Install is time-consuming and tools are mediocre Directions are misleading Shell has minor imperfections and slicker feel than OEM Risk of scratching during install
B**E
Honestly this is one of the best shells I've come across, let alone for the Steam Deck. It feels great, looks fantastic and fit together arguably better than the stock shell. Mine creaked when the shell was pressed below the screen and this one didn't, so clearly done something better than Valve to sort that out! I did keep the original buttons though as it looks quite cheap going with all purple - but that's just me. The kit had everything you need to swap and Extreme Rate have a YouTube video that was really well done and easy to follow, so I'd recommend watching that like I did. I can't fault it and whilst this isn't a reflection on the shell, it's definitely not for the feint of heart. You take everything apart, including the screen (which I'd never done before) so I wouldnt do it as your first ever shell swap. If you do though, watch their video, take it slow and keep track of which screws go where so you don't ruin any of the posts with the wrong screws. My tip: I used several egg pots and scrap paper to say what they were - worked well!
P**N
Perfect fit, with a good video writeup of how to assemble it. This is not a beginners kit, it will require some knowledge of electronics to complete, as well as 4+ hours of time.
H**.
Alles wie beschrieben, sehr passgenau. Einbau erfordert aber handwerkliches Geschick.
A**S
Bin super zufrieden mit dem Ergebnis und wie unser Deck jetzt aussieht. Hab wie viele die originalen Tasten für einen schöneren Kontrast behalten und ich denke die Bilder sprechen für sich. Das Gehäuse sitzt genau so gut wie das originale und der Kunststoff fasst sich deutlich angenehmer an als der alte. Mittlerweile wird auch kein Metall Pick mehr mitgeliefert, stattdessen 4 an den Spitzen angeschärfte Plastik Picks. Auch wenn der mitgelieferte Saugnapf nicht unbedingt optimal ist war das entfernen des Bildschirmes damit am Ende deutlich einfacher als ich erwartet hatte. Der gesamte Umbau und die vielen Teile organisiert zu halten war zwar durchaus anspruchsvoll, aber nicht so schwer wie man sich das erst mal vorstellt. Hat sich absolut gelohnt 💜
G**A
Producto excelente, mi steamdeck es el modelo original y quedo a la perfección. Solo hay que ser muy organizado para no perder las piezas ya que la instalación si tiene su grado de complejidad.
TrustPilot
vor 1 Woche
vor 2 Wochen