We remain fully operational. Our teams are working around the clock to ensure your deliveries continue safely.

Laden Sie die App herunter


Kundendienst
Copyright © 2025 Desertcart Holdings Limited
Laden Sie die App herunter


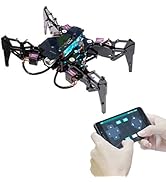
🚀 Command the future of DIY robotics with Mars Rover PiCar-B!
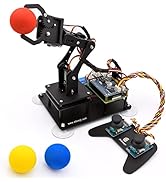
The Adeept Mars Rover PiCar-B is a cutting-edge STEM educational robot kit designed for Raspberry Pi 4/3B/3B+ users. It features voice control, OpenCV-based object tracking, real-time video streaming, and ultrasonic obstacle avoidance. With comprehensive assembly instructions and Python coding support, it empowers beginners and enthusiasts to dive deep into AI robotics, making it an ideal hands-on learning tool for tech-savvy millennials and their families.


| ASIN | B085C8DFT8 |
| Assembly Required | Yes |
| Batteries Required? | Yes |
| Batteries included? | No |
| Best Sellers Rank | 318,565 in Toys & Games ( See Top 100 in Toys & Games ) 483 in Toy Robots |
| Colour | Black/White |
| Customer Reviews | 3.9 3.9 out of 5 stars (94) |
| Date First Available | 18 April 2020 |
| Educational Objective(s) | Coding & Programming, Robotics, Electronics,Stem |
| Item model number | ADR012 |
| Manufacturer recommended age | 0 - 8 years |
| Material Type(s) | Acrylic |
| Number of pieces | 1 |
| Product Dimensions | 20.8 x 14.7 x 15.9 cm; 1 kg |
| Radio Control Suitability | Education, DIY projects, STEM learning |
| Remote Control Type | Wired |
| tech_spec_battery_description_toys | 2 x 18650 batteries (not included) |
D**.
I think it is the best kit on the market for this price point
Build it with my 8yo son in about 2 hours, he was very happy about it and with the result. Now he is testing different codes for the openCV and the obstacle avoidance to prepare the kit for a contest. He is very very happy with it. Works great and runs very well. Tested with a Raspberry Pi 4B 4GB. Not included: the Raspberry Pi board and 18650 batteries. This advanced kit is by far the best I worked with, in this price range: - great build quality - great accessories included - all parts fits perfectly - PDF and online video (also youtube) with full details for the assembly - the Motor HAT is great and fully functional - all the motors and sensors included - Raspberry Pi Camera included - all cables needed included - the wheels are great - all the necessary codes available on Adeept site, fully working - all the tools necessary for the assembly available in the box - the openCV code works fine - the obstacle avoidance code (with the ultrasonic) works fine - BIG PLUS: it has extra room for more connected accessories (motors, sensors) and the kit could be improved for any specific need. We highly recommend this kit! It has some really cool features and can be used both inside and outside.
W**I
It’s good but not for the faint hearted!
If you’re expecting to receive this and have all clear instructions and an easy set up guide with everything working quickly and easily… this is not the kit for you. I know it’s not much to ask for in this day and age, even for a cheap kit but I would recommend it still. I’m an engineer and it gave me a few head scratching moments but someone with patience will get through it. Read some Q&A when you get stuck, the end result is good. I had a couple of broken bits of plastic but was easy to fix. The one that surprised me was all three servos supplied where all faulty. I didn’t even think to check them before installing them and once I tried a test program, thought I must be doing something wrong. I had a servo tester and sure enough, all three not working. Either not moving, moving very slowly with no power or jittering over to one side. I bought a pack of SG90 servos (the size used for this kit) and tested them first before installing, then all good. Installation instructions and software setup instructions are on the adeept.com website. I found using a combination of using the V1 and V2 instructions to build it as although they not 100% the same, they are close enough and between the two instructions to work out what to do. When it comes to the software for the raspberry pi (which you need to supply) one set says to install the latest version of raspbian but the adeept software hasn’t been updated for the way the camera system is handled in the new version. You need to install raspbian 2021-5-07 for the software to work with the car correctly. That said, once it’s done, it is very good and works well, great for plenty of AI and robotic experiments.
S**L
Well made, well documented fun Raspberry pi project
I am buying it for some machine learning applications. There are many pi rovers for home projects. However, this is one of the best made and documented products at this price range. I spent one evening assembling all parts and ran several tests. All components worked for the first time. I had great fun while doing it. The product does not come with a manual. However, you can simply google the "adeept mars rover-b" and find the PDF version. Remember to use *the 2nd version* of the manual which fixed many typos in the 1st version. The document is reasonably well-written and in hindsight, many of my problems could have been avoided if I had followed the manual at the beginning. I would also recommend connecting all motors/LEDs to the control board to have a "dry run" before the full assembly, which saves you the trouble of disassembling later. The structure is also very robust. My pi-car fell off from my desktop (75cm) and only one servo motor suffered slight damage (which is then fixed using the provided spare motor).
M**L
A great kit with a quality problem, the servos!
I built the Mars Rover PiCar-B and the problem is that the sensor head (the big head with the Ultrasound and camera) starts to rattle around as soon as it moves, only holding it or moving to the end of the servo movement stops it. It's like the servos can't hold it in position, it also makes the impression it is not very stable on top on that one tiny servo, which seems to be overwhelmed with it. I've now bought myself upgraded servos, or better said "suitable servos". The servos in the box seem to be either fake Tower Pro, or absolutely overwhelmed with this robot car. I've tested the servos with a servo tester, one was already broken and probably caused more pain for the other one in the head. If I wouldn't love to build those things, I would be super angry about such a low quality, or let's say unfit for purpose part in this kit, because I had a lot more hours to make it work! The new servos are from the same manufacturer "Tower Pro" but the model is the MG90D, with a lot more power, metal gear and digital, so very precise. I paid £7 per servo, so that was an extra £21, but now I can have a calm mind and work properly with this robot car. If other models are equipped with the same low quality, I would think twice before I buy, and if only with a discount so I can pay for the other servos. Hope this helps others!
C**S
El montaje es muy entretenido y esta muy bien explicado. Como cosa curiosa, hay piezas de sobra, tanto tornillos y tuercas como otras que se prevé que se pueden gastar o estropear más. Lo que es importante también es tener algo de conocimiento en programación python, cosa de la que yo carecía, pero me estoy poniendo las pilas. Todavía no he conseguido guiarlo con el mando y espero que en internet me puedan ayudar
M**N
This has allowed me to elevate the subject I teach and really test the kids knowledge of IT.
M**S
This is my second robotics kit from Adeept. And I really enjoyed assembling the PiCar-B. The tutorial is easy to follow and each step has some logic in it. That makes the process more intuitive. Not blind following the instructions, but active thinking. For example to add the connector lights, you must understand the technique behind it to assemble the wires correctly so everything fits in place. I want to mention one specific part of the process namely the placing of the pi-camera. The inventor used tiny nuts to prevent damage to the connector. The nuts are used to create a gap between the acryl plate and the printed circuit board. A really smart finding. The installation of the software was easy. After setting up the Raspberry Pi, it only requires to run an installation script. After that the PiCar-B could be control by a web based app. My nephew with the age of 5 had a lot of fun controlling/driving the PiCar. As a programmer, I liked the detailed pages in the tutorial about the libraries used to run this car with Python. Therefore this kit benefits a range of users with different ages and experiences. The following weeks I am going to find out how the line tracking sensor works from a technical part, and my nephew to control it by the app. For now I learned a lot. Keep up the good work Adeept!
P**O
Pregi: Kit interessante e ben confezionato, proposto al giusto prezzo (anche se il necessario Raspberry e' a parte e rappresenta una spesa non indifferente, specie se si sceglie, come e' consigliabile in caso si voglia successivamente lavorare sul software di bordo, un modello da 4 o 8 GB). Fornisce una piattaforma gia' ben attrezzata e che si presta a espansioni, aggiunte, modifiche. Documentazione curata, quasi senza errori e facilmente reperibile online. Montaggio non rapido ma, soprattutto prestando la dovuta attenzione a non perdere o mischiare le vitine, completabile in qualche ora. Difetti: Per caricare le batterie (due celle 18650 fornite) va usato un caricabatterie esterno (non fornito). Sarebbe stato piu' comodo prevedere una presa di ricarica a bordo del veicolo, ad esempio la classica USB. Non c'e' modo da software per conoscere il livello di carica delle batterie. Controllandolo da remoto e' quindi impossibile sapere quanta autonomia resta prima di perdere il collegamento. Il servo che gestisce la rotazione panoramica della "testa" puo' non avere spunto sufficiente per iniziare il movimento, soprattutto se si stringono troppo le viti del cuscinetto, ma anche allentandole non si ottiene grande vigore; il momento d'inerzia evidentemente e' un po' eccessivo e consiglierebbe un servo piu' robusto. La percezione degli ostacoli data dalla scansione ultrasuoni (con rotazione della "testa"), come mostrata dal grafico dell'interfaccia di controllo web, e' poco precisa: messo davanti al nulla puo' "vedere" ostacoli che non ci sono. I percorsi da far fare ai cablaggi (soprattutto quelli della "testa", con un delicato cavo piatto che rischia di rompersi presto per fatica) sono un po' lasciati alla fantasia di chi assembla il kit. La documentazione infatti si concentra sulle parti strutturali e non da' indicazioni su dove e come far passare i cavi.
C**N
Très bien
TrustPilot
vor 1 Woche
vor 1 Monat