🥳 Unleash the Power of Probiotics!
Kefir Grains are a living culture of beneficial bacteria and yeast that allow you to create your own probiotic-rich kefir at home. Just 1 teaspoon can yield a batch of creamy, tangy kefir, promoting gut health and wellness. Perfect for health enthusiasts and culinary adventurers alike!
J**R
Great kefir grains!
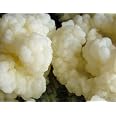
This is my second time buying from this seller. They deliver an excellent product!When you first get your grains they are going to look *very* small and nothing like the picture. There isn't anything wrong with them, this is how they are shipped so they survive the journey. You will need to spend a couple days to a week "healing" them before they're actually able to produce drinkable kefir. The way I "heal" my grains when I first get them is I put the grains straight into about two to three ounces of milk for 24 hrs and change out their milk every 12-24 hrs for about a week. For that first week the milk barely changes at all, it will be very watery and won't really ferment much. But after a couple of days, you will notice a change in your grains as they start to get plumper and grow. As they do, you'll start noticing the milk gets a bit thicker. How quickly your grains heal, grow and ferment will depend on the temperature in your home. The warmer it is the faster they ferment and vice versa.Once you get them going you will have kefir grains coming out your ears! I had jars and jars of them and had to find new homes for all the grains as I couldn't keep up! You can eat the grains as a way to keep their growth under control, it is a very cheap but potent probiotic "pill" if you will.I've been making kefir for about two years now and here are some tips for anyone interested (the seller sends some excellent directions with their product as well)Making Homemade KefirWhat you need:- clean glass jars, quart size with wide mouth work great- a nonmetal sieve - Amazon sells a good nylon sieve here: [...]- a plastic spatula- freshly cleaned hands and counter surfaces- fresh non-homogenized milkThe ratio of kefir grains to milk is 1:7. I usually use whole non-homogenized milk. Kefir can be fermented from 12-48 hrs at room temperature. You don't need any fancy equipment like a yogurt maker just some free counter space for your jar to sit. I usually use a 24 hr schedule for my kefir but you can experiment and find what you like, the longer it goes the stronger and tarter it will be and also the less lactose it will contain as you've given the culture a longer time to consume the lactose sugars. After it has sat undisturbed for 8 hours you can also stir it with plastic spoon to increase the fermentation speed.When you are ready to strain your kefir, wash your hands, the counter and make sure you have a clean quart jar, nylon sieve, plastic spoon (or spatula) and something to strain the kefir into such as a bowl or large measuring cup (2-4 cup capacity). Stir kefir with plastic spoon to break up the curd and make it easier to strain. Pour the kefir into the nylon sieve and tap firmly on the edge of the bowl or measuring cup to get the kefir to strain through mesh and into the bowl. The longer you've let the kefir ferment the more persistent you will have to be to get it to strain as it will be thicker. Continue filling the sieve and tapping until you only have kefir grains remain in the sieve. Place grains into your clean quart jar (I don't rinse my grains although some people do, I find my grains are "healthier" if I don't rinse them), add fresh milk and place lid lightly on top (don't screw closed). Set out of the way where the jar will not be moved or disturbed while it ferments (it needs to be undisturbed for the first 8 hrs, after which you can stir it to increase the fermentation process as noted above). Store your newly strained kefir in the fridge in a jar with a tightly fitted lid. Kefir should stay fresh for over a week at least.If you don't have a plastic sieve yet, you can use your clean fingers. Stir kefir with the plastic spoon as stated above to break up the curd then pour the contents into a shallow bowl. Use your fingers to "comb" through the kefir and fish out the individual grains and place them in a clean jar. Once you've found all your grains you can whisk the kefir left in the bowl to give it a better consistency which will help combining the kefir and whey. After whisking pour contents of bowl in glass container and store in fridge with a tightly fitted lid.Don'ts- Don't screw lid tight on jar, the kefir needs to breath, it is an aerobic culture! Set lid so it just covers jar and prevents fruit bugs and other foreign objects from contaminating kefir- Never place kefir grains in hot jar. Heat can damage and kill the kefir. If jar is hot out of the dishwasher, pour fresh milk in first before introducing grains- Don't use any metal objects with the kefir grains, only glass or plasticDos- Do wash your hands and make sure you are working with a clean jar, surface, and plastic utensils- Only rinse grains if they get contaminated by falling on an unclean surface. Rinse in cool (never hot) filtered water- Drink kefir straight after straining while it is still room temperature, chilled and plain, mixed with honey and vanilla, or blended with honey, vanilla, and a combination of the following: coconut oil, peanut butter, dark chocolate and/or your favorite fruit!- Visit Dom's Kefir Making Website: [...] he's consider the "guru" of kefir making, you will find a lot of good info and history thereThere are tons of other resources out there but this is the system I found to work well with the kefir grains I bought from this seller. Hope you have fun and enjoy! :)
C**N
6 + Years later, these little babies are still going strong
Funny story...My son was looking for something on the counter and by seeing my mason jar with kefir fermenting on it, said "Mom, how many years have you had these kefir grains for? ". So I came here to look and it turns out these little soldiers (their babies and grand-grand-grand-grand-grand ++++ babies) have been making great healthy homemade kefir for me since Ocrober 2014. It is now 6 years 1 month later and these grains have produced multiple generations of new babies and have been going strong for years! They are very hardy. There are times when I have placed the mason jar I culture the milk in with the grains in my fridge and kept them in there for a month or two (I don't recommend it but life happens) and they still come out to the counter alive and ready to eat lactose and provide rich probiotic ferment for my immune system. I have given baby grains to numerous friends and colleagues because the colonies increase continuously. There are many excellent videos on YouTube, but here is what I have learned after 6 years of continuous kefir fermentation:*** I culture my kefir in a mason jar on the counter (see picture). Strain out the kefir in another container, grains remain in jar (I use a mason jar strainer cap which is usually used for sprouting - the orange cap in the picture), add a new batch of milk to the jar, put a coffee filter on top to prevent debris, secure filter, let ferment overnight. Voila! More kefir. Easy peasy!*** Kefir grains hate metal. Strain in plastic strainers, keep in glass or ceramic.*** Kefir grains should never be rinsed. Water washes out the protective coating around them and they need their protective coating.*** The warmer the environment is, the faster the colony will eat lactose and the faster the kefir will sour. Keep checking, but give them time to do their job, at least 12-15 hrs at 70 degrees.*** The grains are hardy in cold. You don't need to warm up the milk before you put the grains in. Hot milk is a no no, these are living things that could be destroyed by hot temperatures.*** The fattier the milk, the better. The kefir grains love milk fat for some reason, even though what they eat is lactose. I use whole milk.*** A cup of milk per TBSP of grains is about the right ratio*** Homemade kefir is not going to be like store-bought. It may have a different texture due to the fact that the store-bought is sometimes thickened with starch or other. It is not yogurt, either, so don't expect a yogurt texture from it.*** Kefir has over 40 strains of beneficial bacteria as compared to yogurt, which only has 4-5. You get a greater benefit from kefir.*** I've been known to mix mine with fruit in the blender for a sweet treat.Well, this turned into a novel...lol. Best of luck to you on your quest to healthy probiotic kefir fermentation.
TrustPilot
vor 3 Tagen
vor 2 Tagen